Topic Keywords: Linux, NextGen, operator MMSC
Step 1: Open a terminal session with the server and ensure that you are logged in with a user account that has root privileges available via sudo.
Step 2: Download the NowSMS version that is appropriate for your environment by using one of the following commands:
Standard Linux (Intel/AMD64 microprocessor):
wget https://www.nowsms.com/download/linux/nowsms.tar.gz
ARM 64-bit microprocessor:
wget https://www.nowsms.com/download/linuxarm64/nowsms.tar.gz
Step 3: Extract the installation program, NowSMSInstall with the following command:
tar -xzf nowsms.tar.gz
Step 4: Start the installation with the following command:
./NowSMSInstall
Step 5a: If you are operating in a terminal window under a desktop login, a web browser window will be opened to continue the installation. If you are connected to remote terminal session, continue with Step 5b.
The default directory locations are appropriate for most installations:
Program files will be installed in /usr/local/bin
Data files will be stored in /var/lib/nowsms
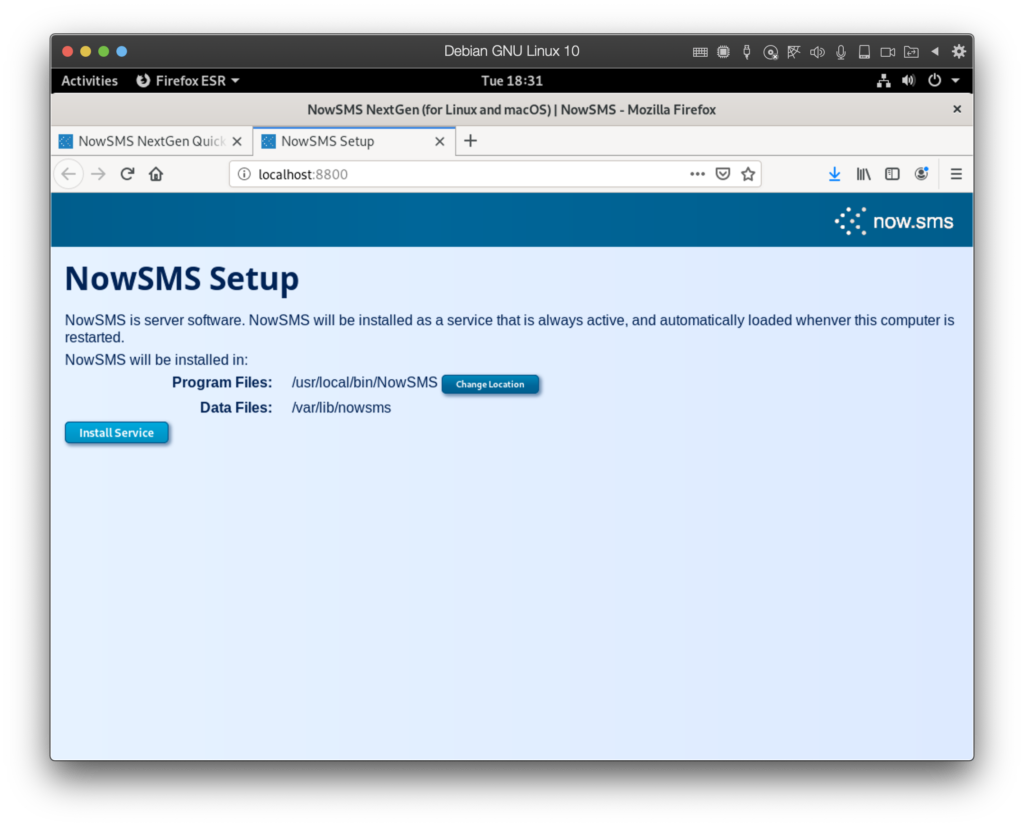
After clicking on the “Install Service” button, in most environments, NowSMS might prompt for the root/admin password, if the system requires it to complete the service installation. This password will be used with the sudo command to perform the installation.
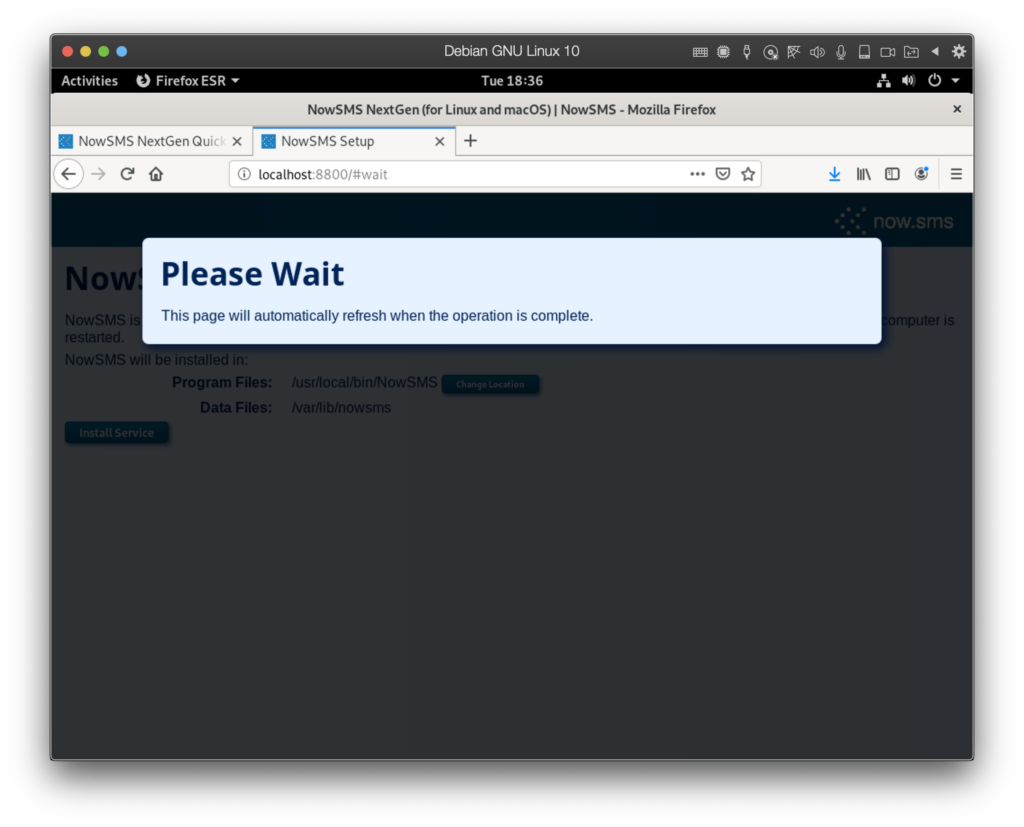
If this is a new (not yet configured) installation, the “System Configuration” menu will be displayed. If the browser reports an error instead, wait a minute, and press the reload button, and/or try manually connecting to http://localhost:8800 to continue. When you see a screen resembling what is shown below, continue with Step 6.

Step 5b: Use the command line interface when installing via a terminal session outside of the desktop environment.
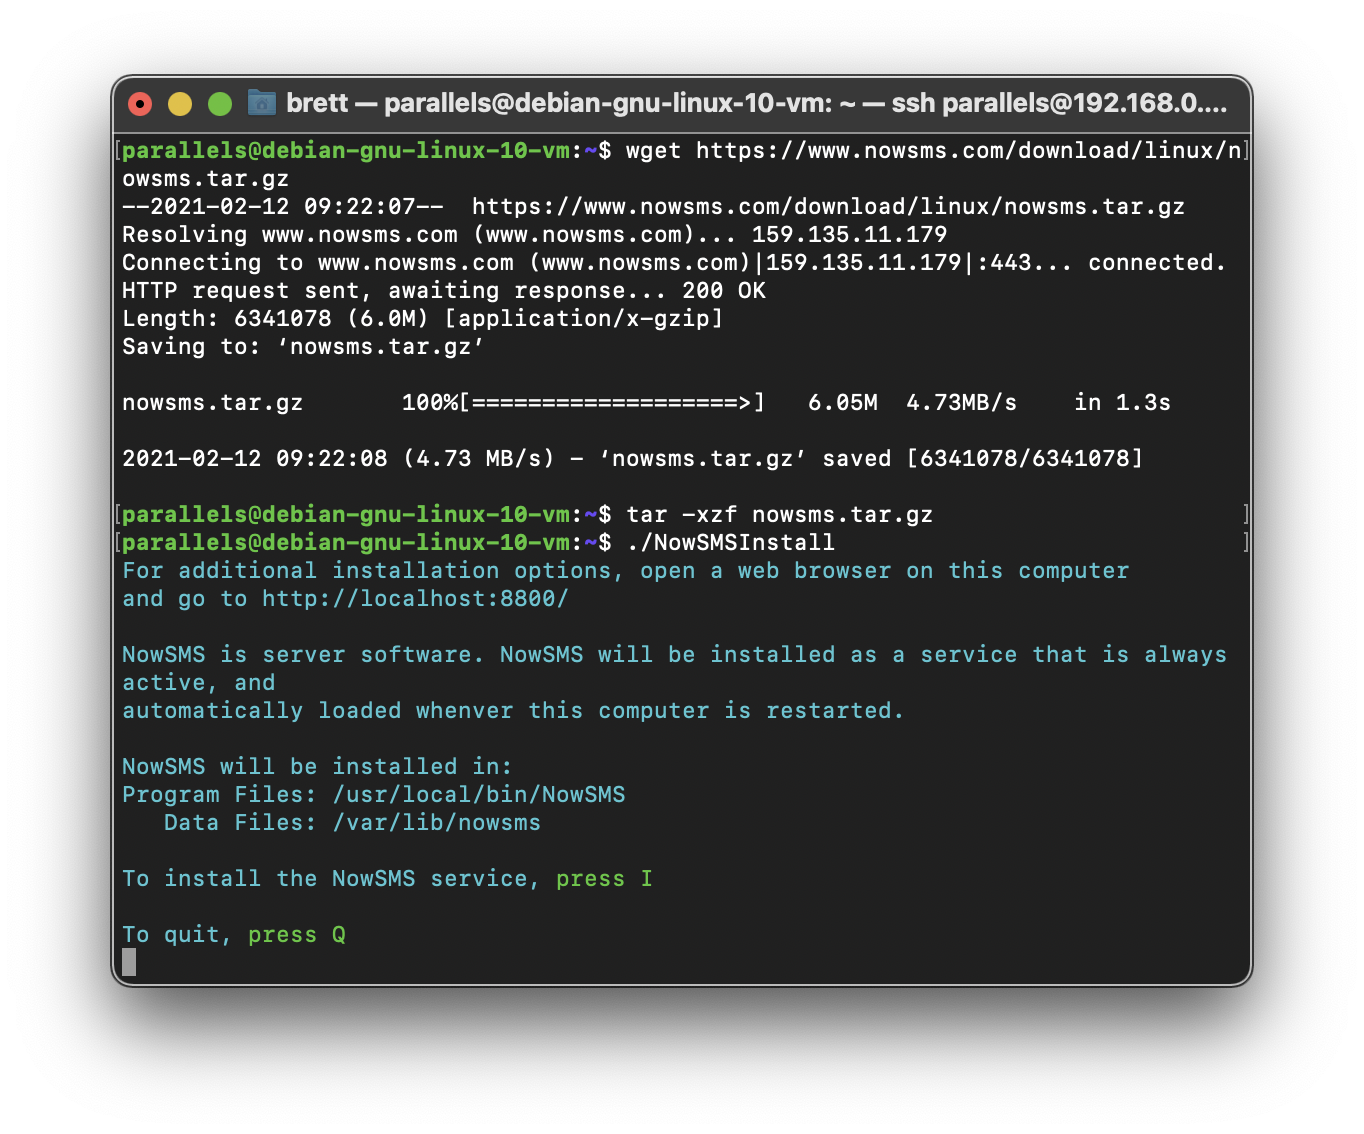
If NowSMS was previously installed, options might be displayed to update the existing install or remove the service. For a new installation, press the “I” key to install NowSMS.
Program files will be installed in /usr/local/bin
Data files will be stored in /var/lib/nowsms
In most environments, NowSMS might prompt for the root/admin password, if the system requires it to complete the service installation. This password will be used with the sudo command to perform the installation.
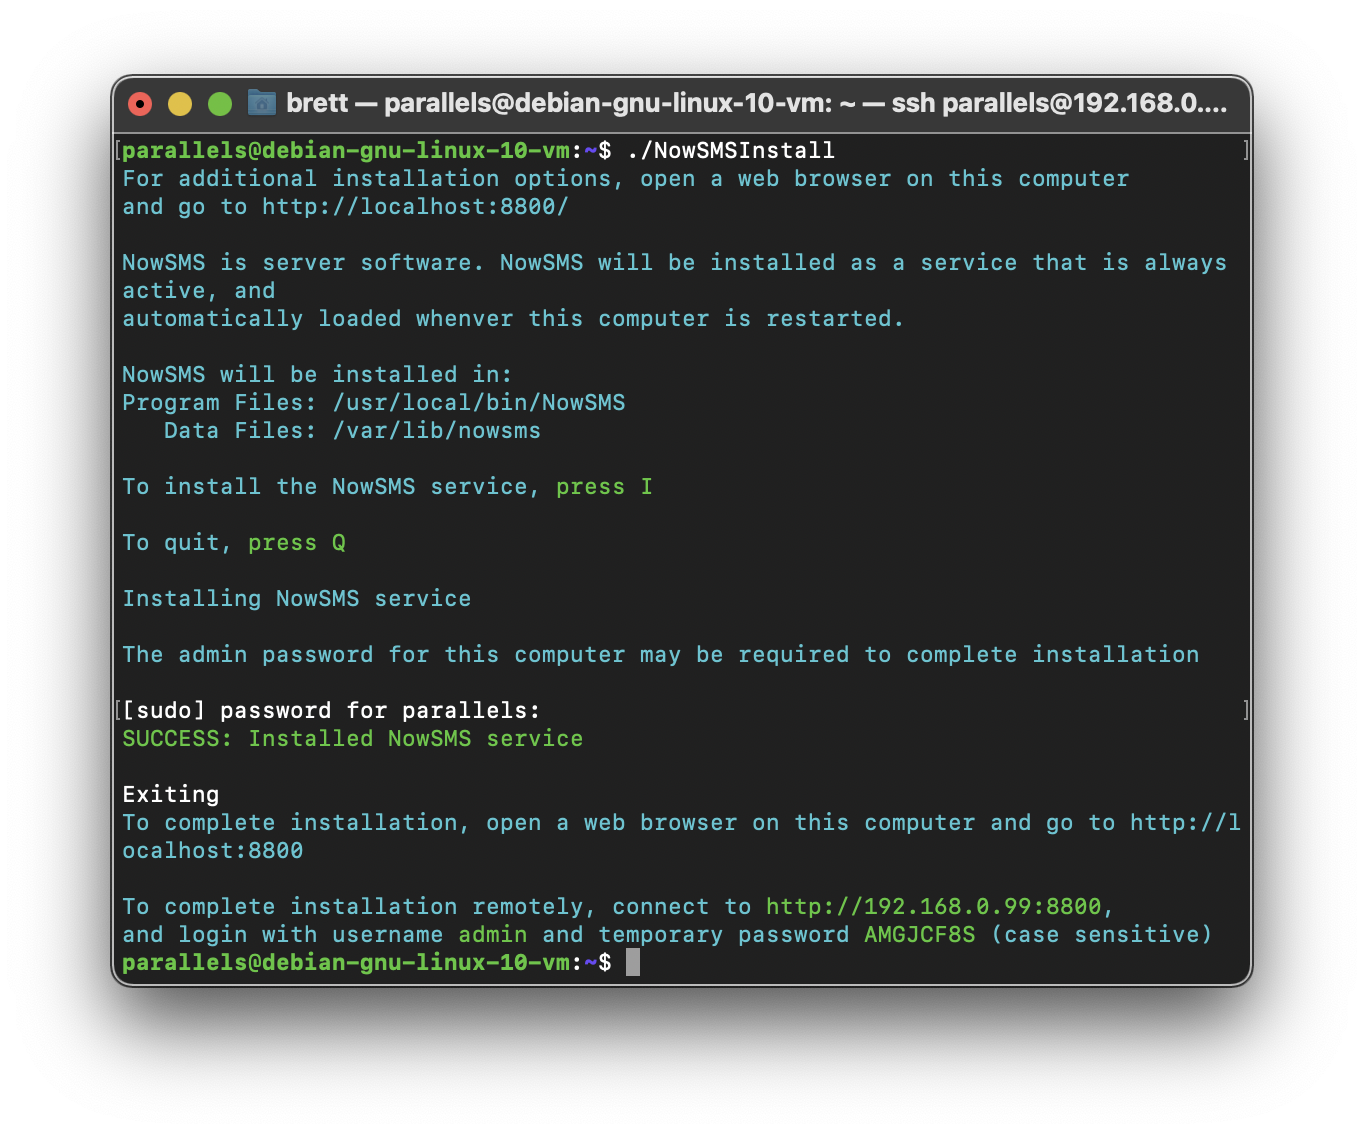
Before exiting, NowSMSInstall will display instructions for completing the installation by connecting with a web browser and using a temporary password, similar to this example:
To complete installation remotely, connect to http://192.168.0.99:8800, and login with username admin and temporary password AMGJCF8S
NowSMS defaults to using port 8800 for the web interface that is used for configuring the system. If another application is already using this port, a different port number might be displayed. If you are unable to connect to this port, it may be necessary to open this port in the Linux system firewall. If you wish to use a different port, it is possible to change this later via the web-based configuration interface, or by manually editing /var/lib/nowsms/SMSGW.INI.
Connect with a web browser to this address, and a NowSMS login window will be displayed.
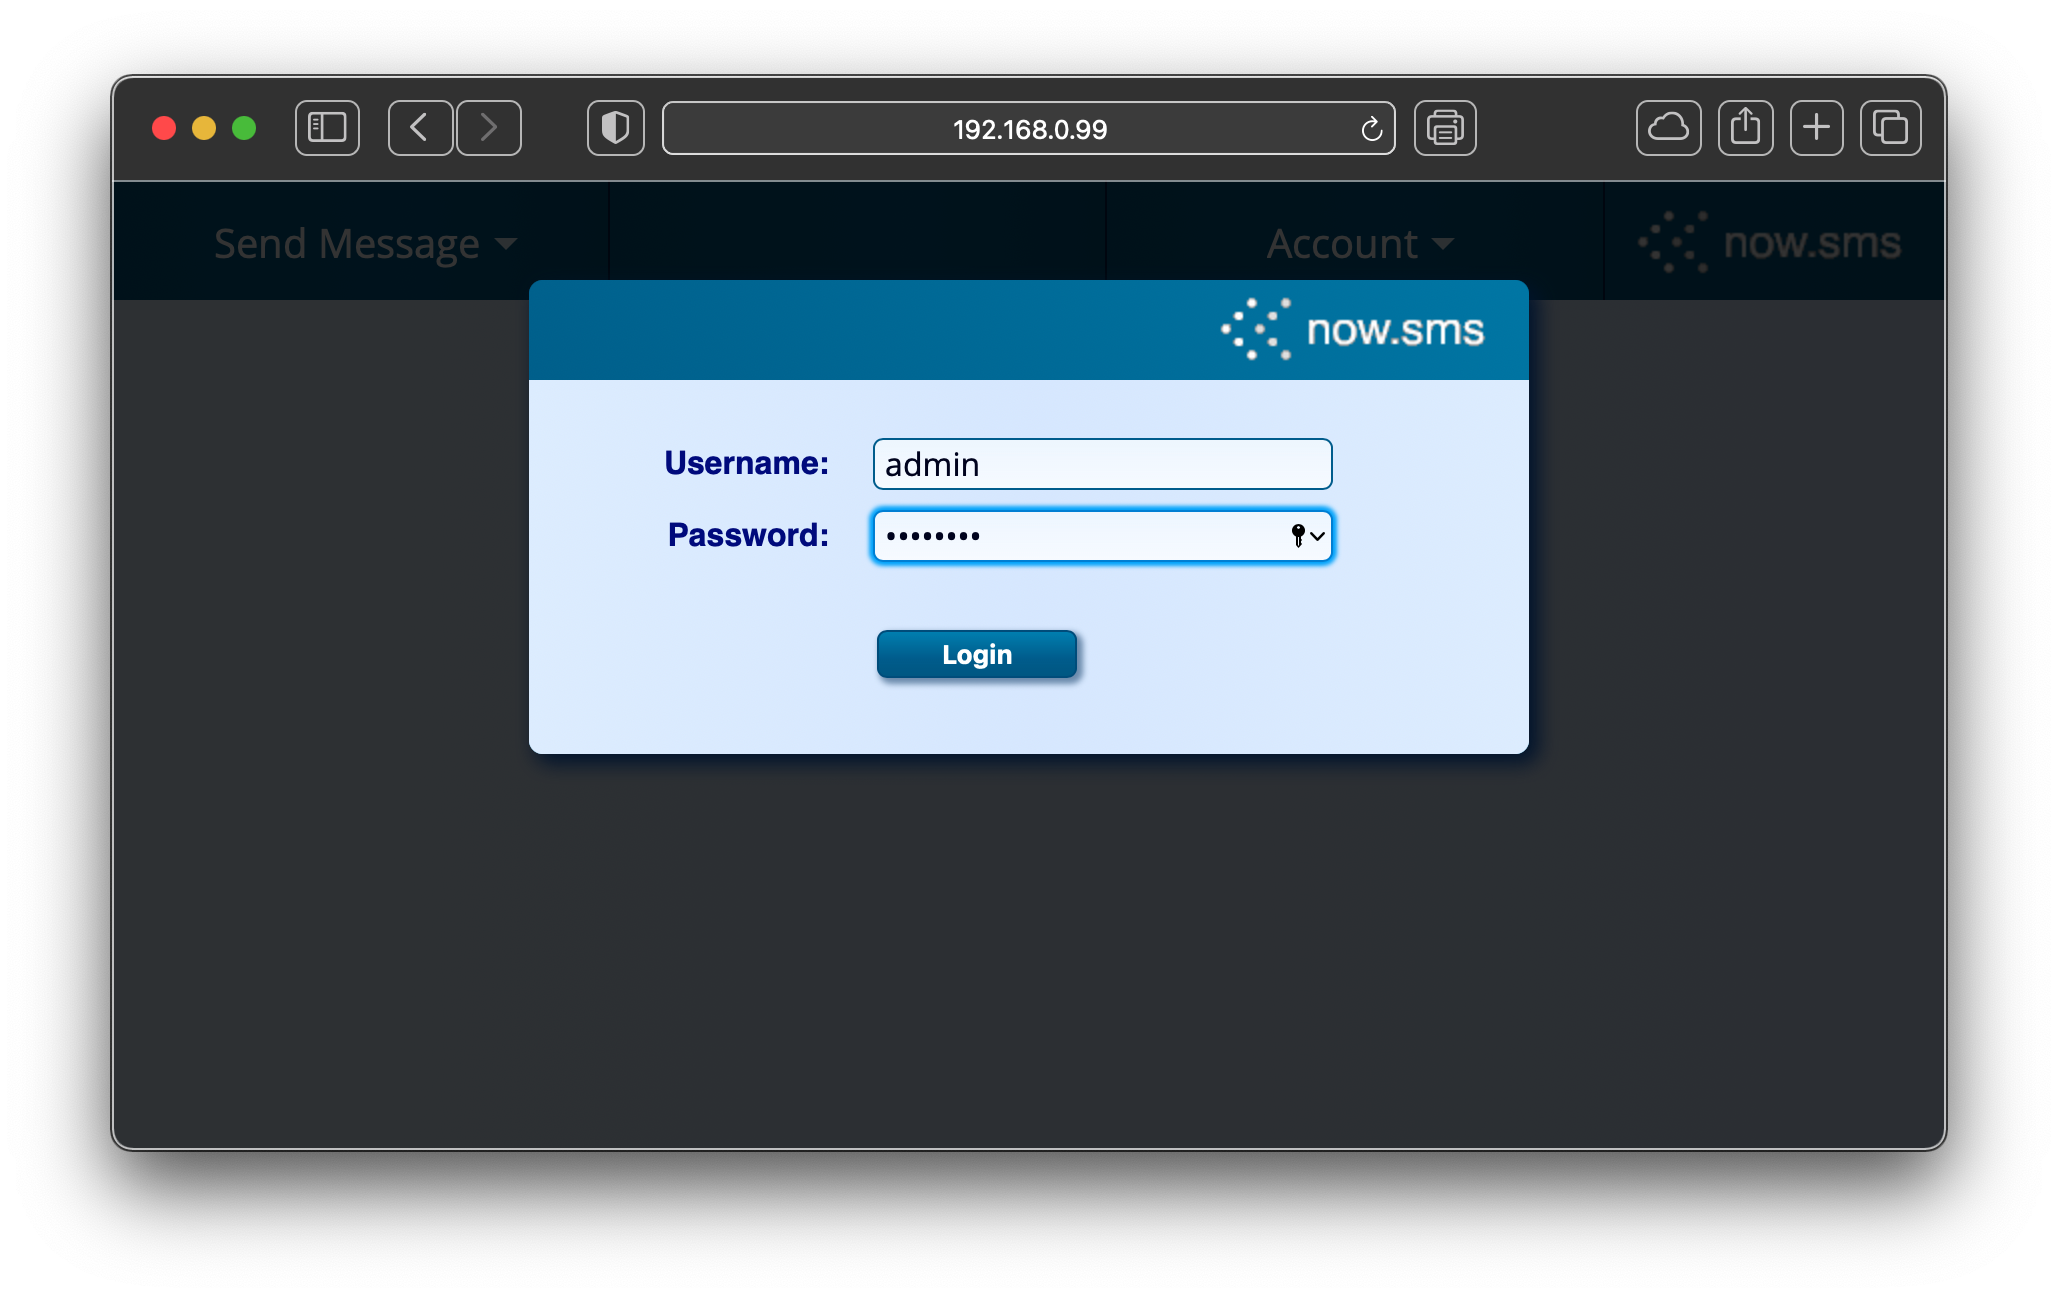
After logging in to this website, the “System Configuration” menu will be displayed, as described in the next step.
Step 6: The “System Configuration” menu should be displayed.
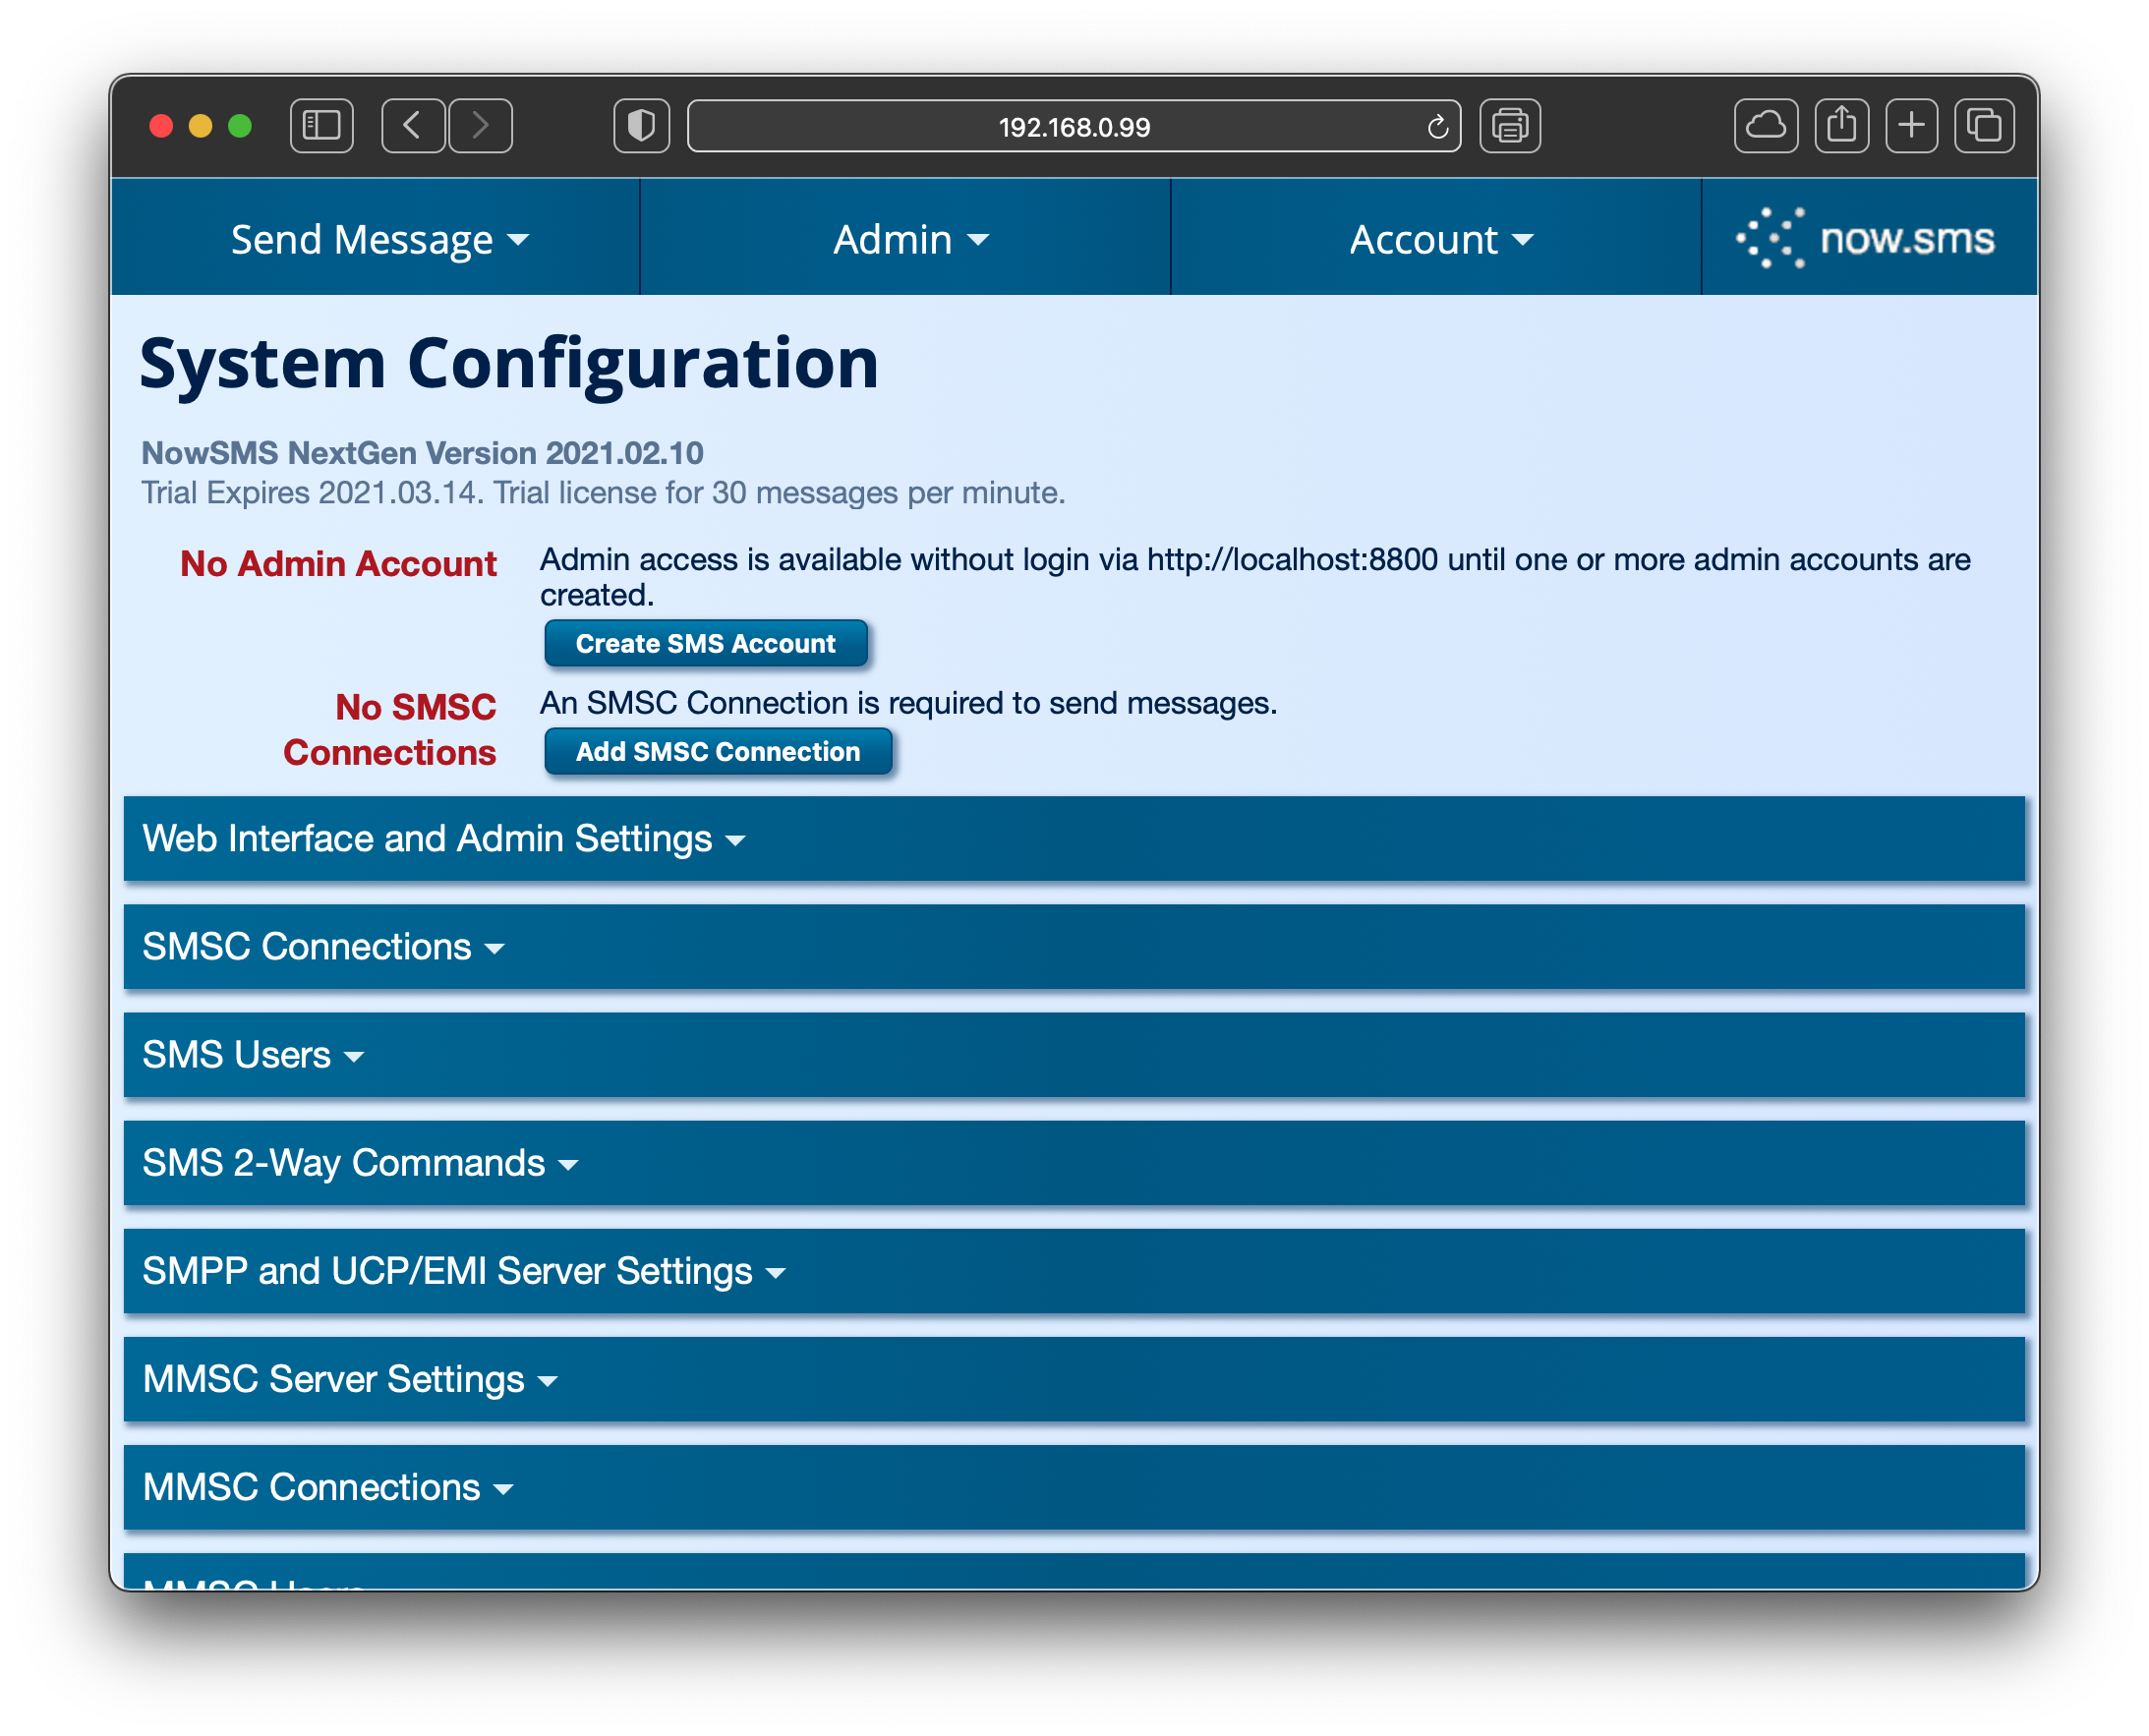
Press the “Create SMS Account” button to define an admin account that will allow you to administer the system.
Define an initial account to be used to administer the system (additional accounts can be configured in the future, as necessary).
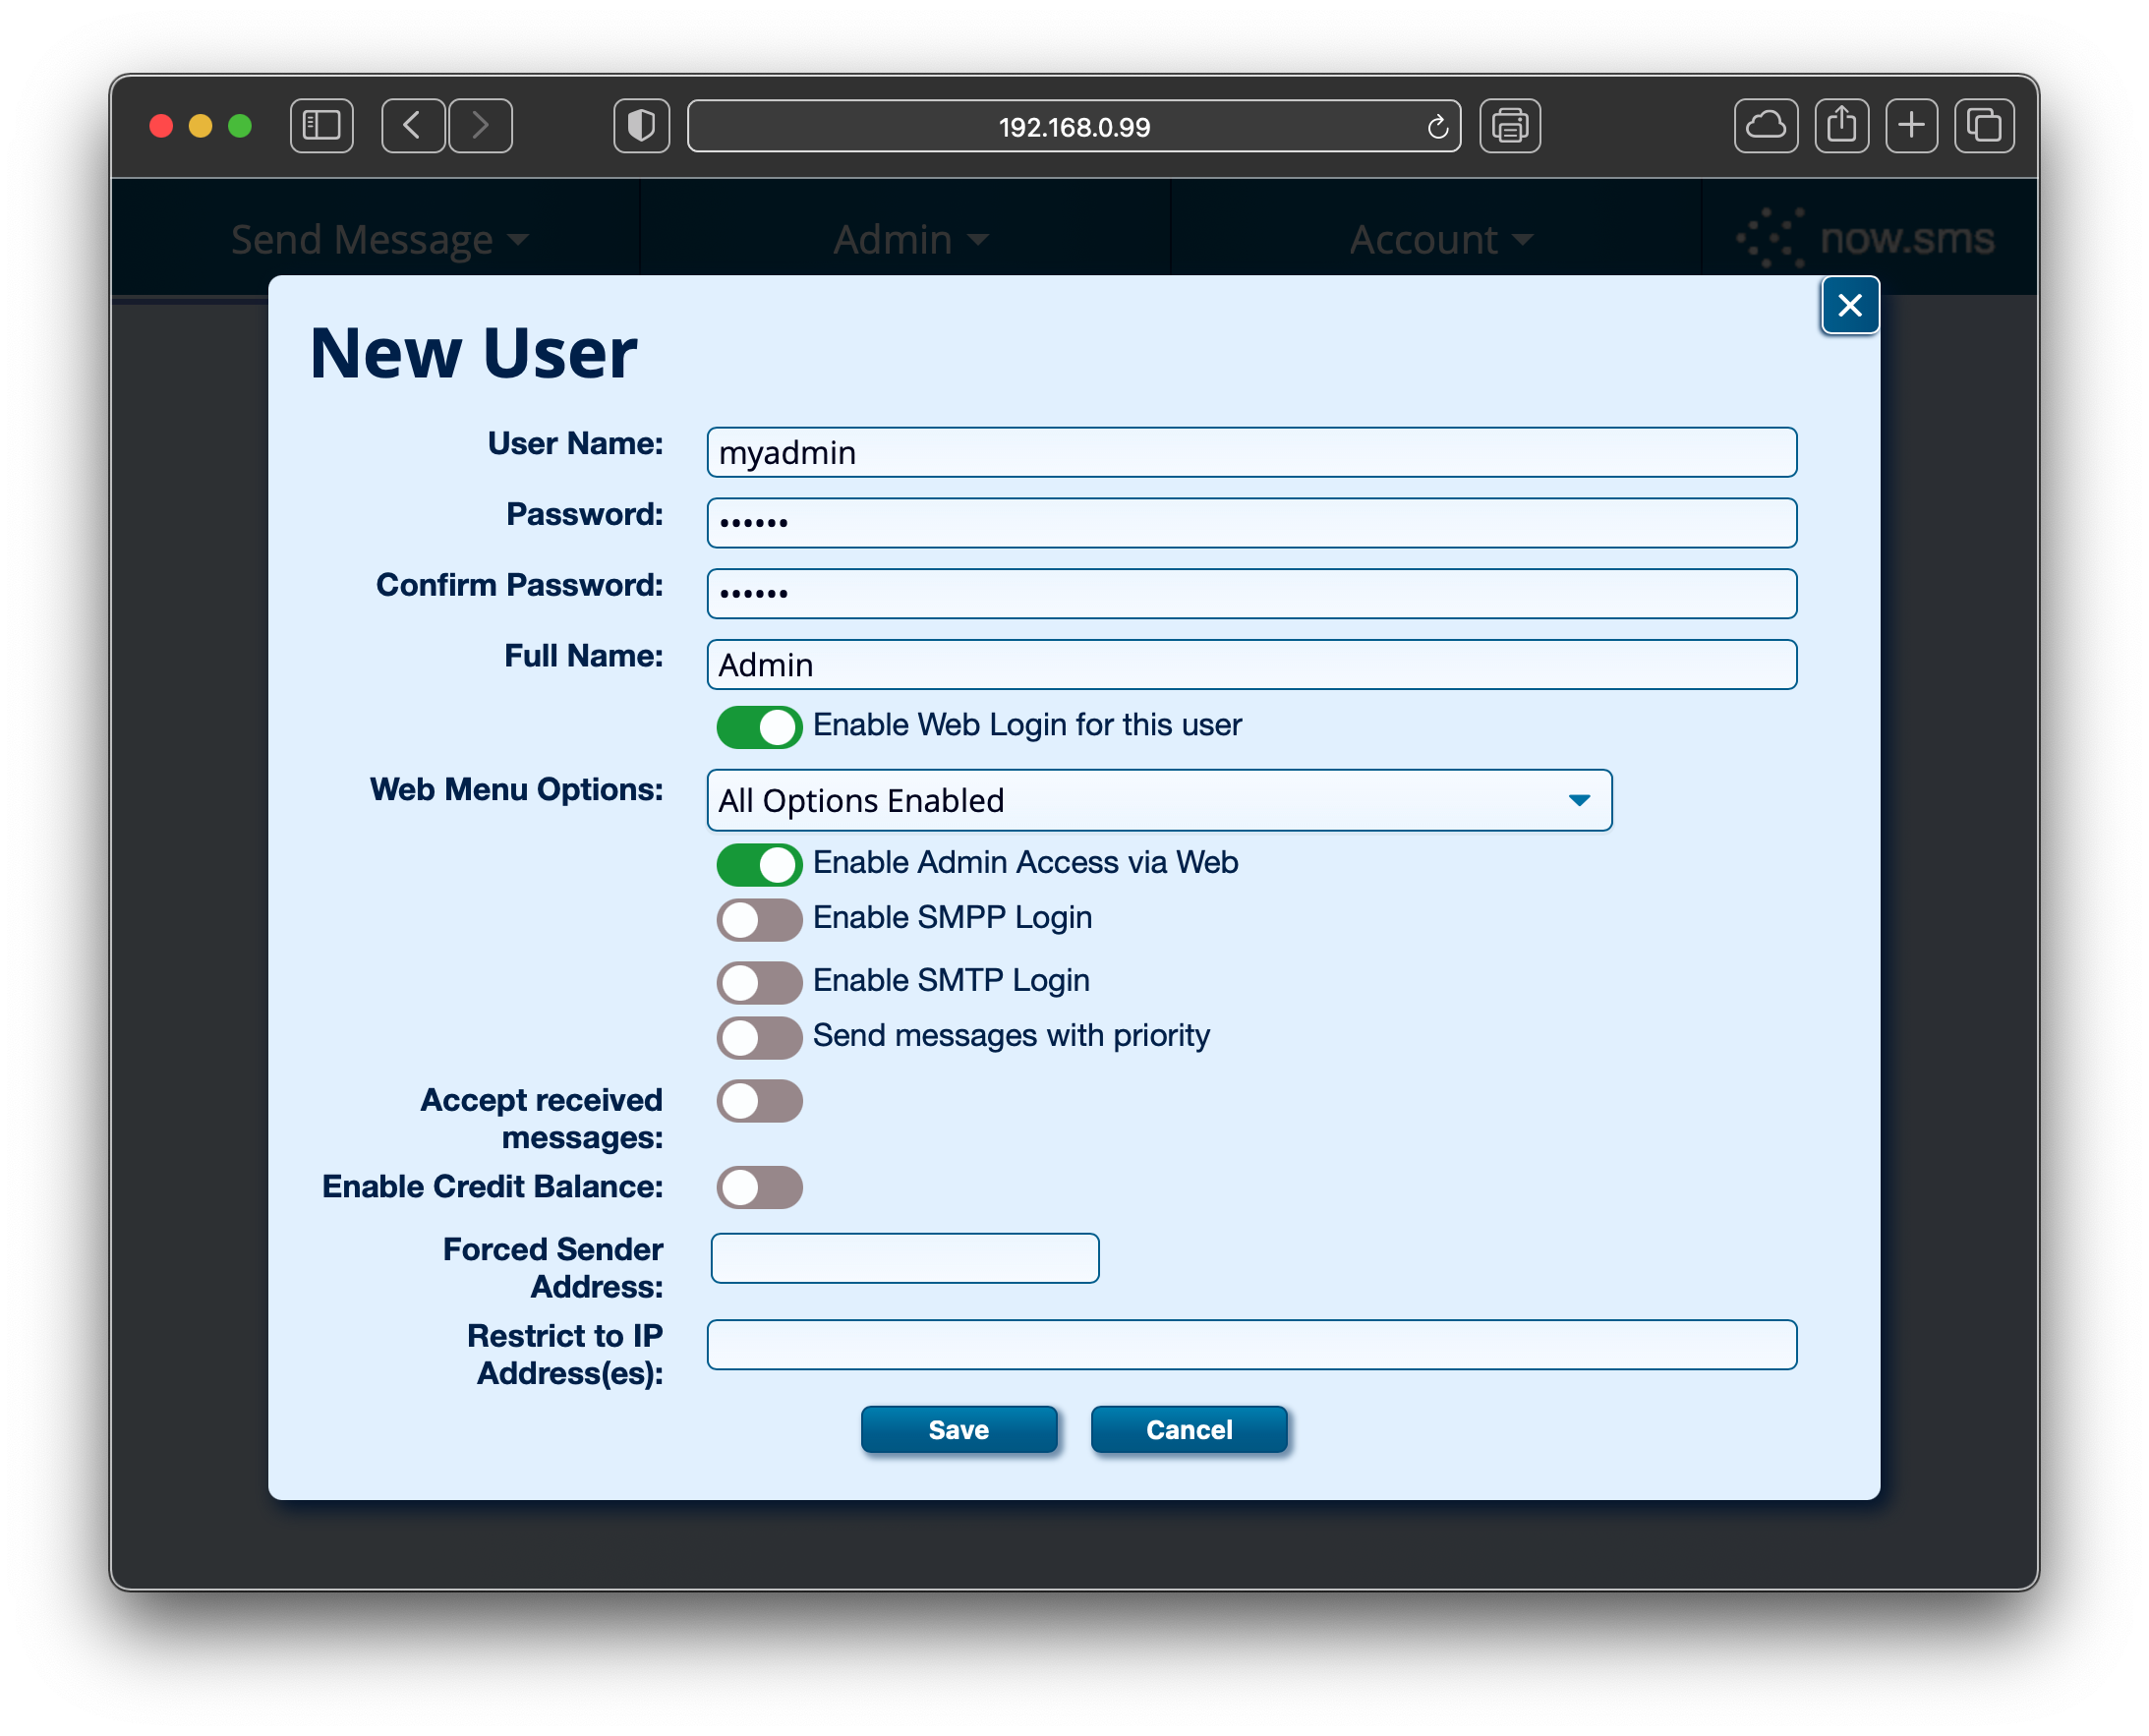
We recommend not defining any IP address restrictions on this account at present, as there is a system-wide IP restriction setting that can be applied elsewhere.
We also recommend using an external firewall to limit access to the port number (default 8800) that is being used for the NowSMS web interface.
Press the Save button.
After a few seconds, the system will recognize that an admin account has been defined, and a login window will be displayed. Login with the credentials of the account that was just created.
Step 7: NowSMS NextGen supports MariaDB or MySQL as a back-end database, which allows multiple servers to share the same configuration settings and provide MMSC services.
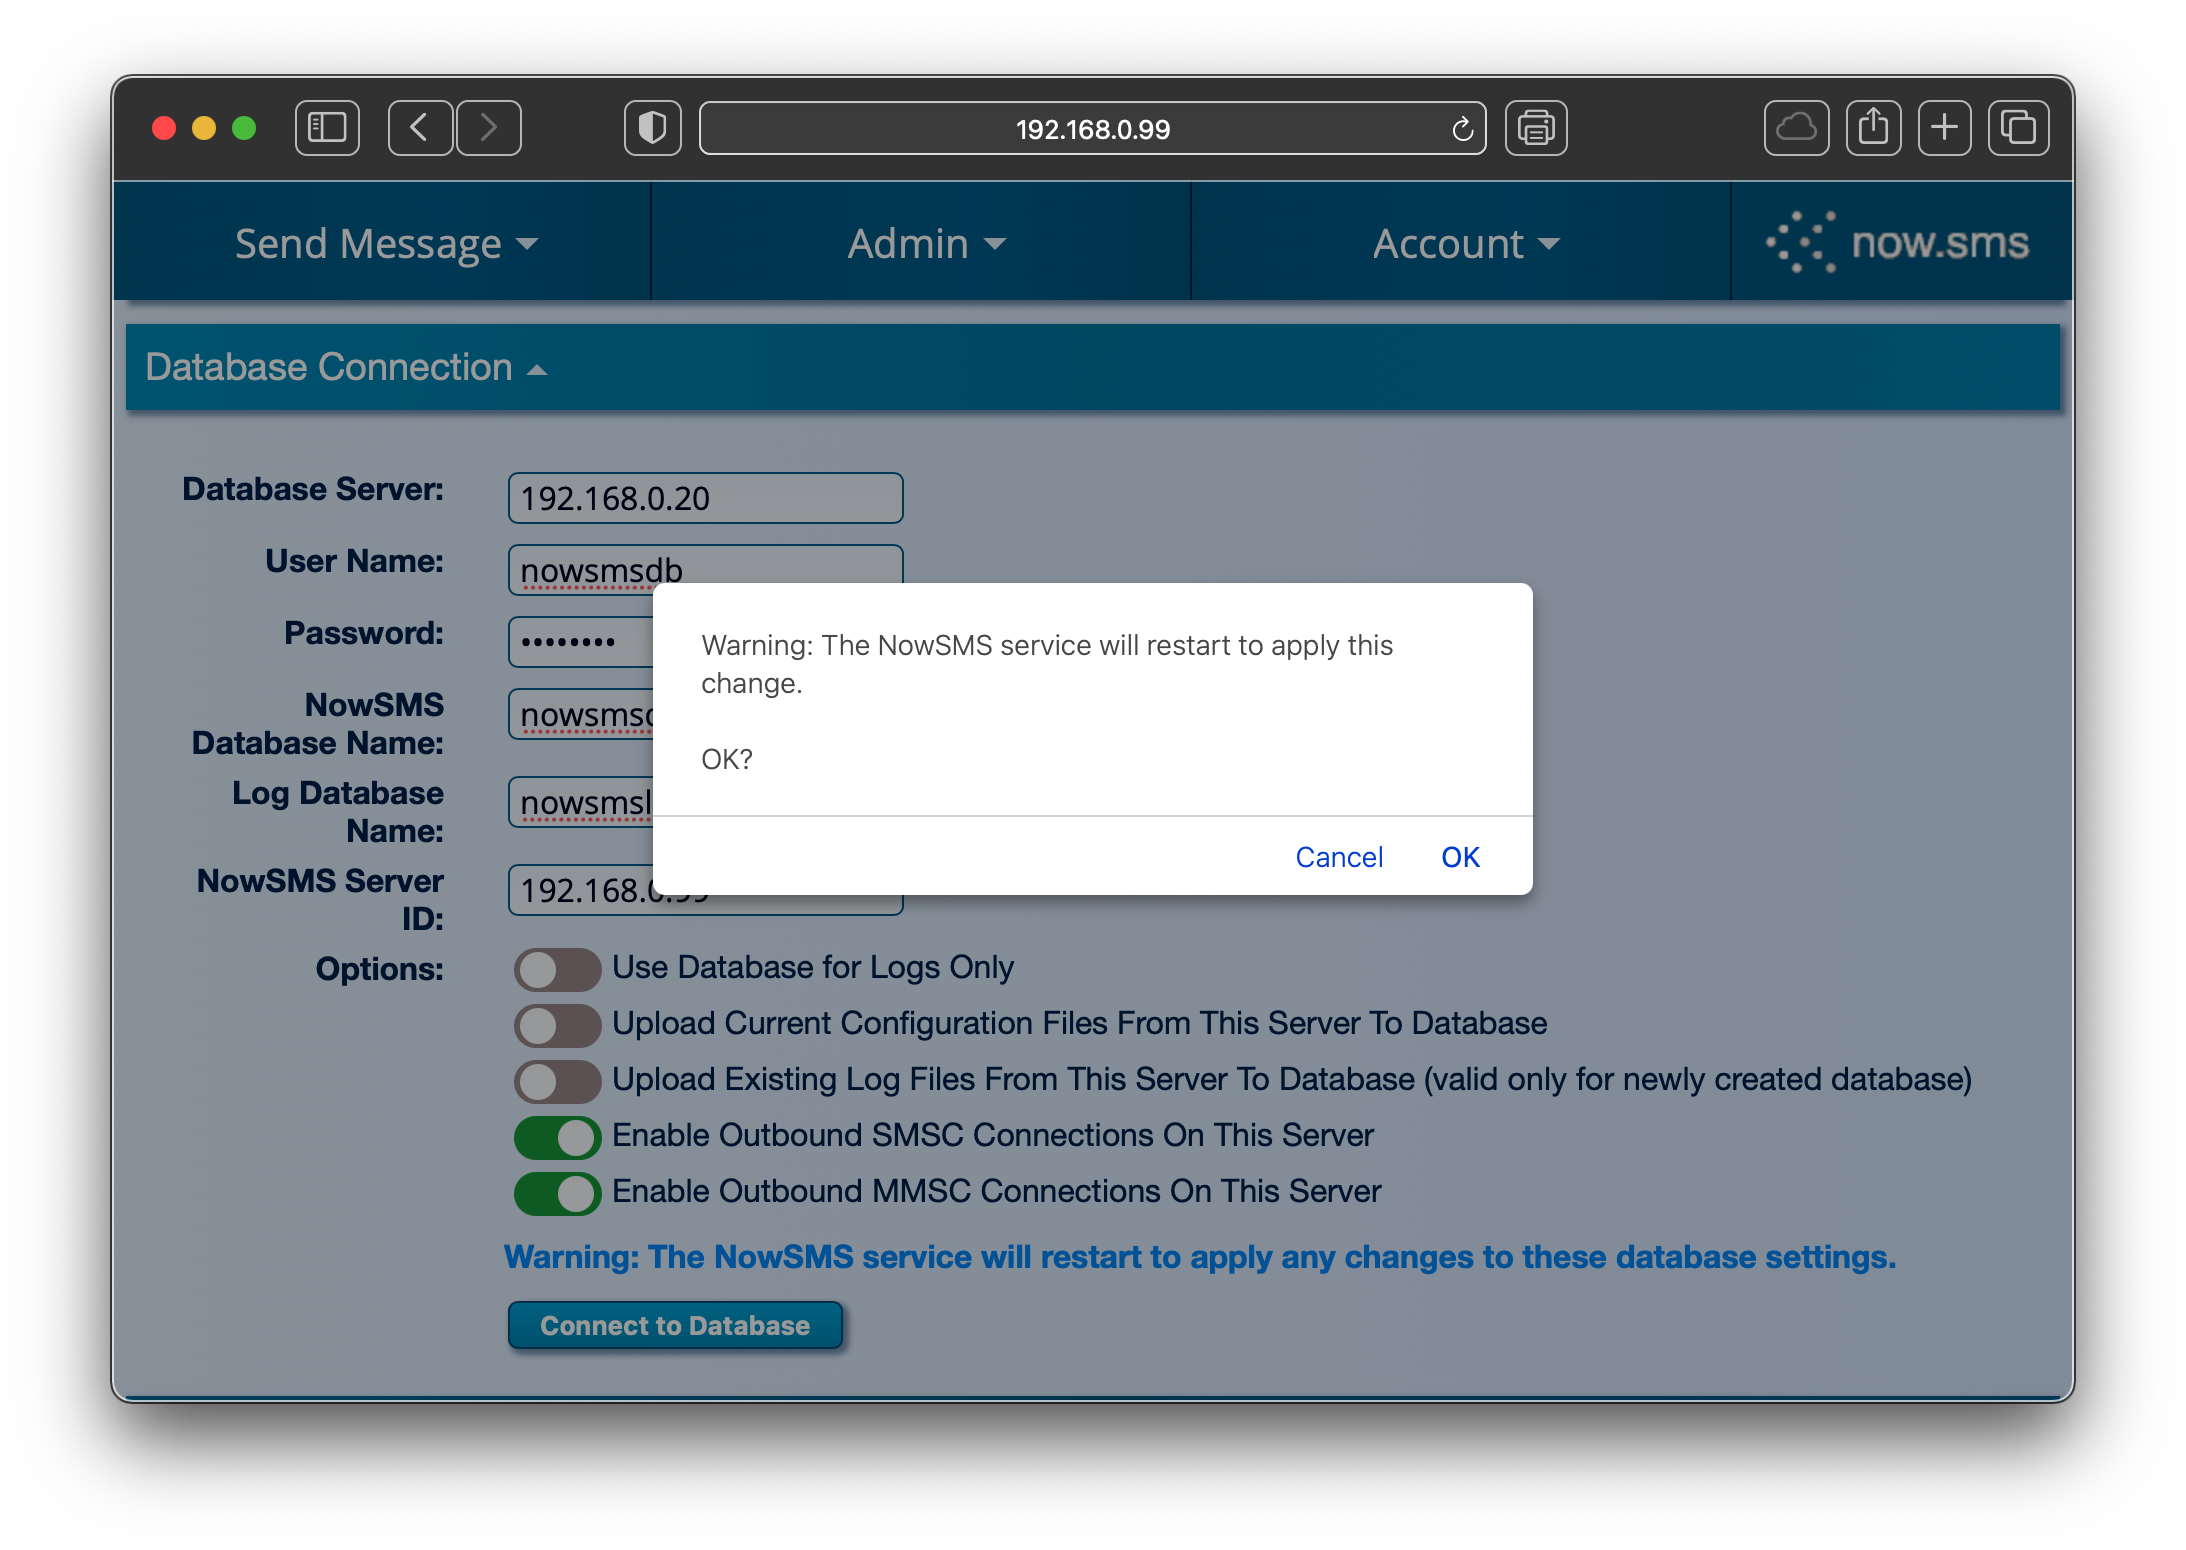
To enable a database connection, on the “System Configuration” page, scroll down to the header labeled “Database Connection”. Click on this header to open this settings category.

Press “Add Database Connection”.
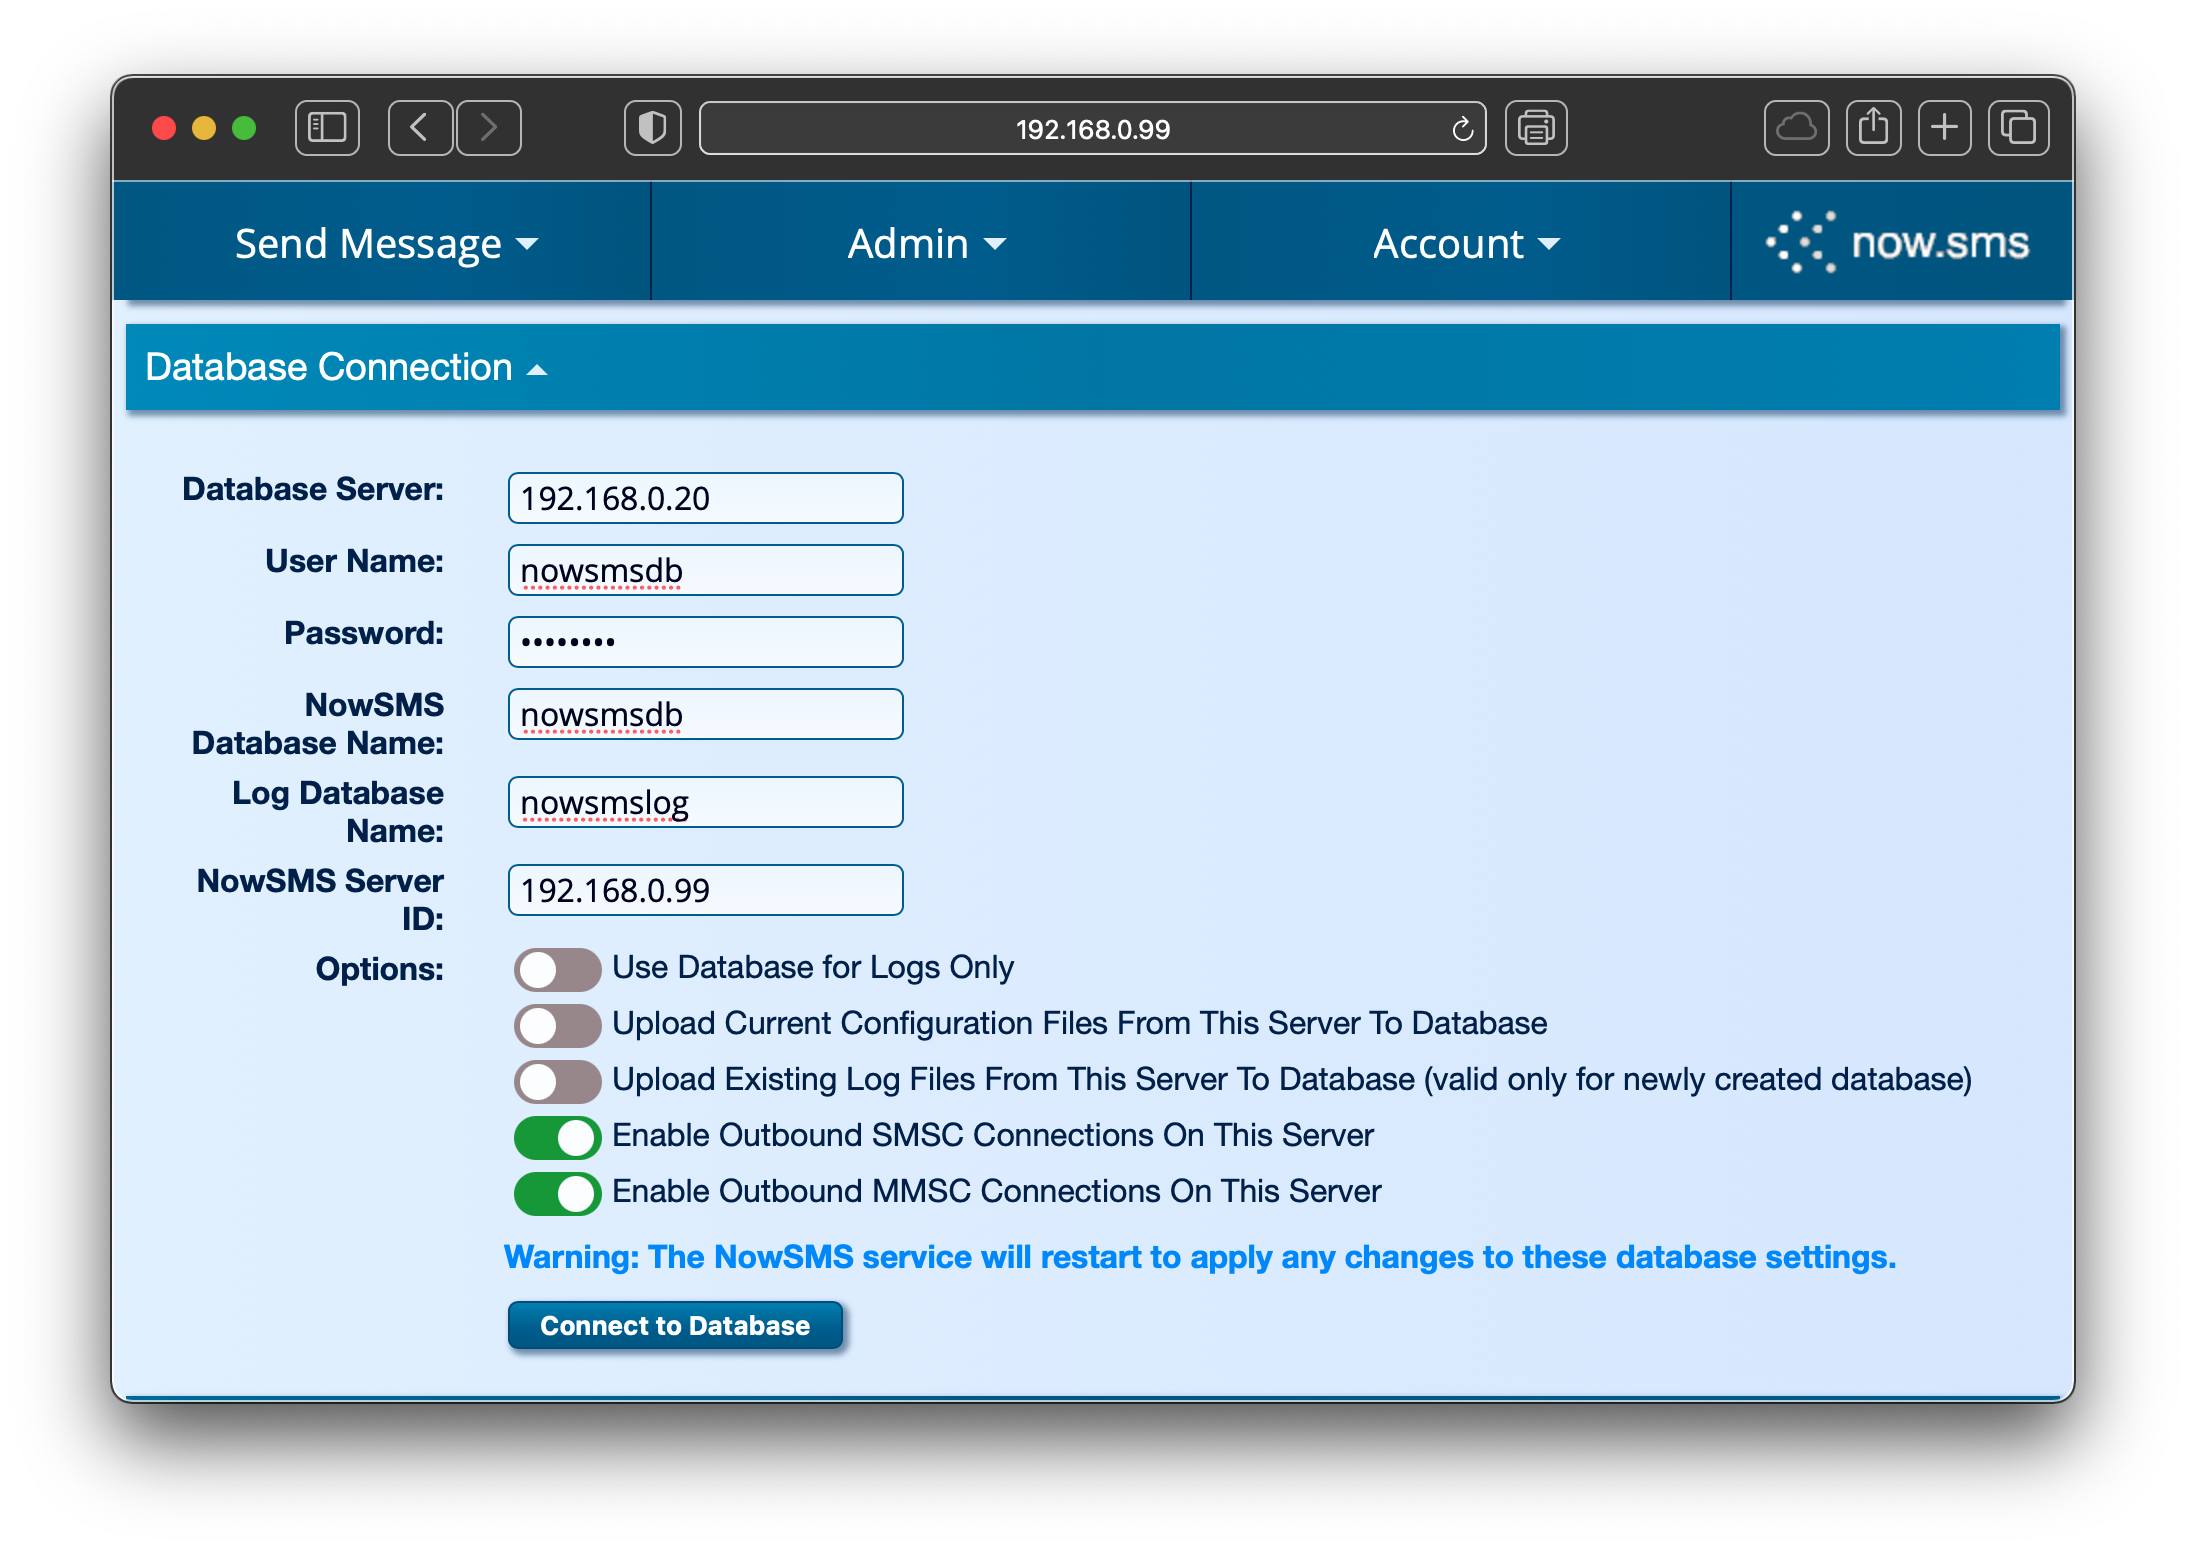
Specify an IP address and user credentials for connecting to the database server. NowSMS uses two databases, one is exclusively used for message logs, while the other database is used for configuration data and message queues.
If the databases do not exist, NowSMS will attempt to create them when you press “Connect to Database”.
“NowSMS Server ID” is an indicator that will be used in the logs to record which server processed each event. The default value for this setting is the server’s primary IP address, but this value can be set to a simple text-based name for the server.
The default options are recommended for most connections.
If this is the first server to connect to the database, NowSMS will upload the current configuration files to the database.
If another server has previously connected to the database, NowSMS will download the current configuration files from the server and replace any current configuration on the server. If a server has previously connected to the database, but the connection was severed, and you wish to replace the configuration settings in the database use “Upload Current Configuration Files From This Server To Database”.
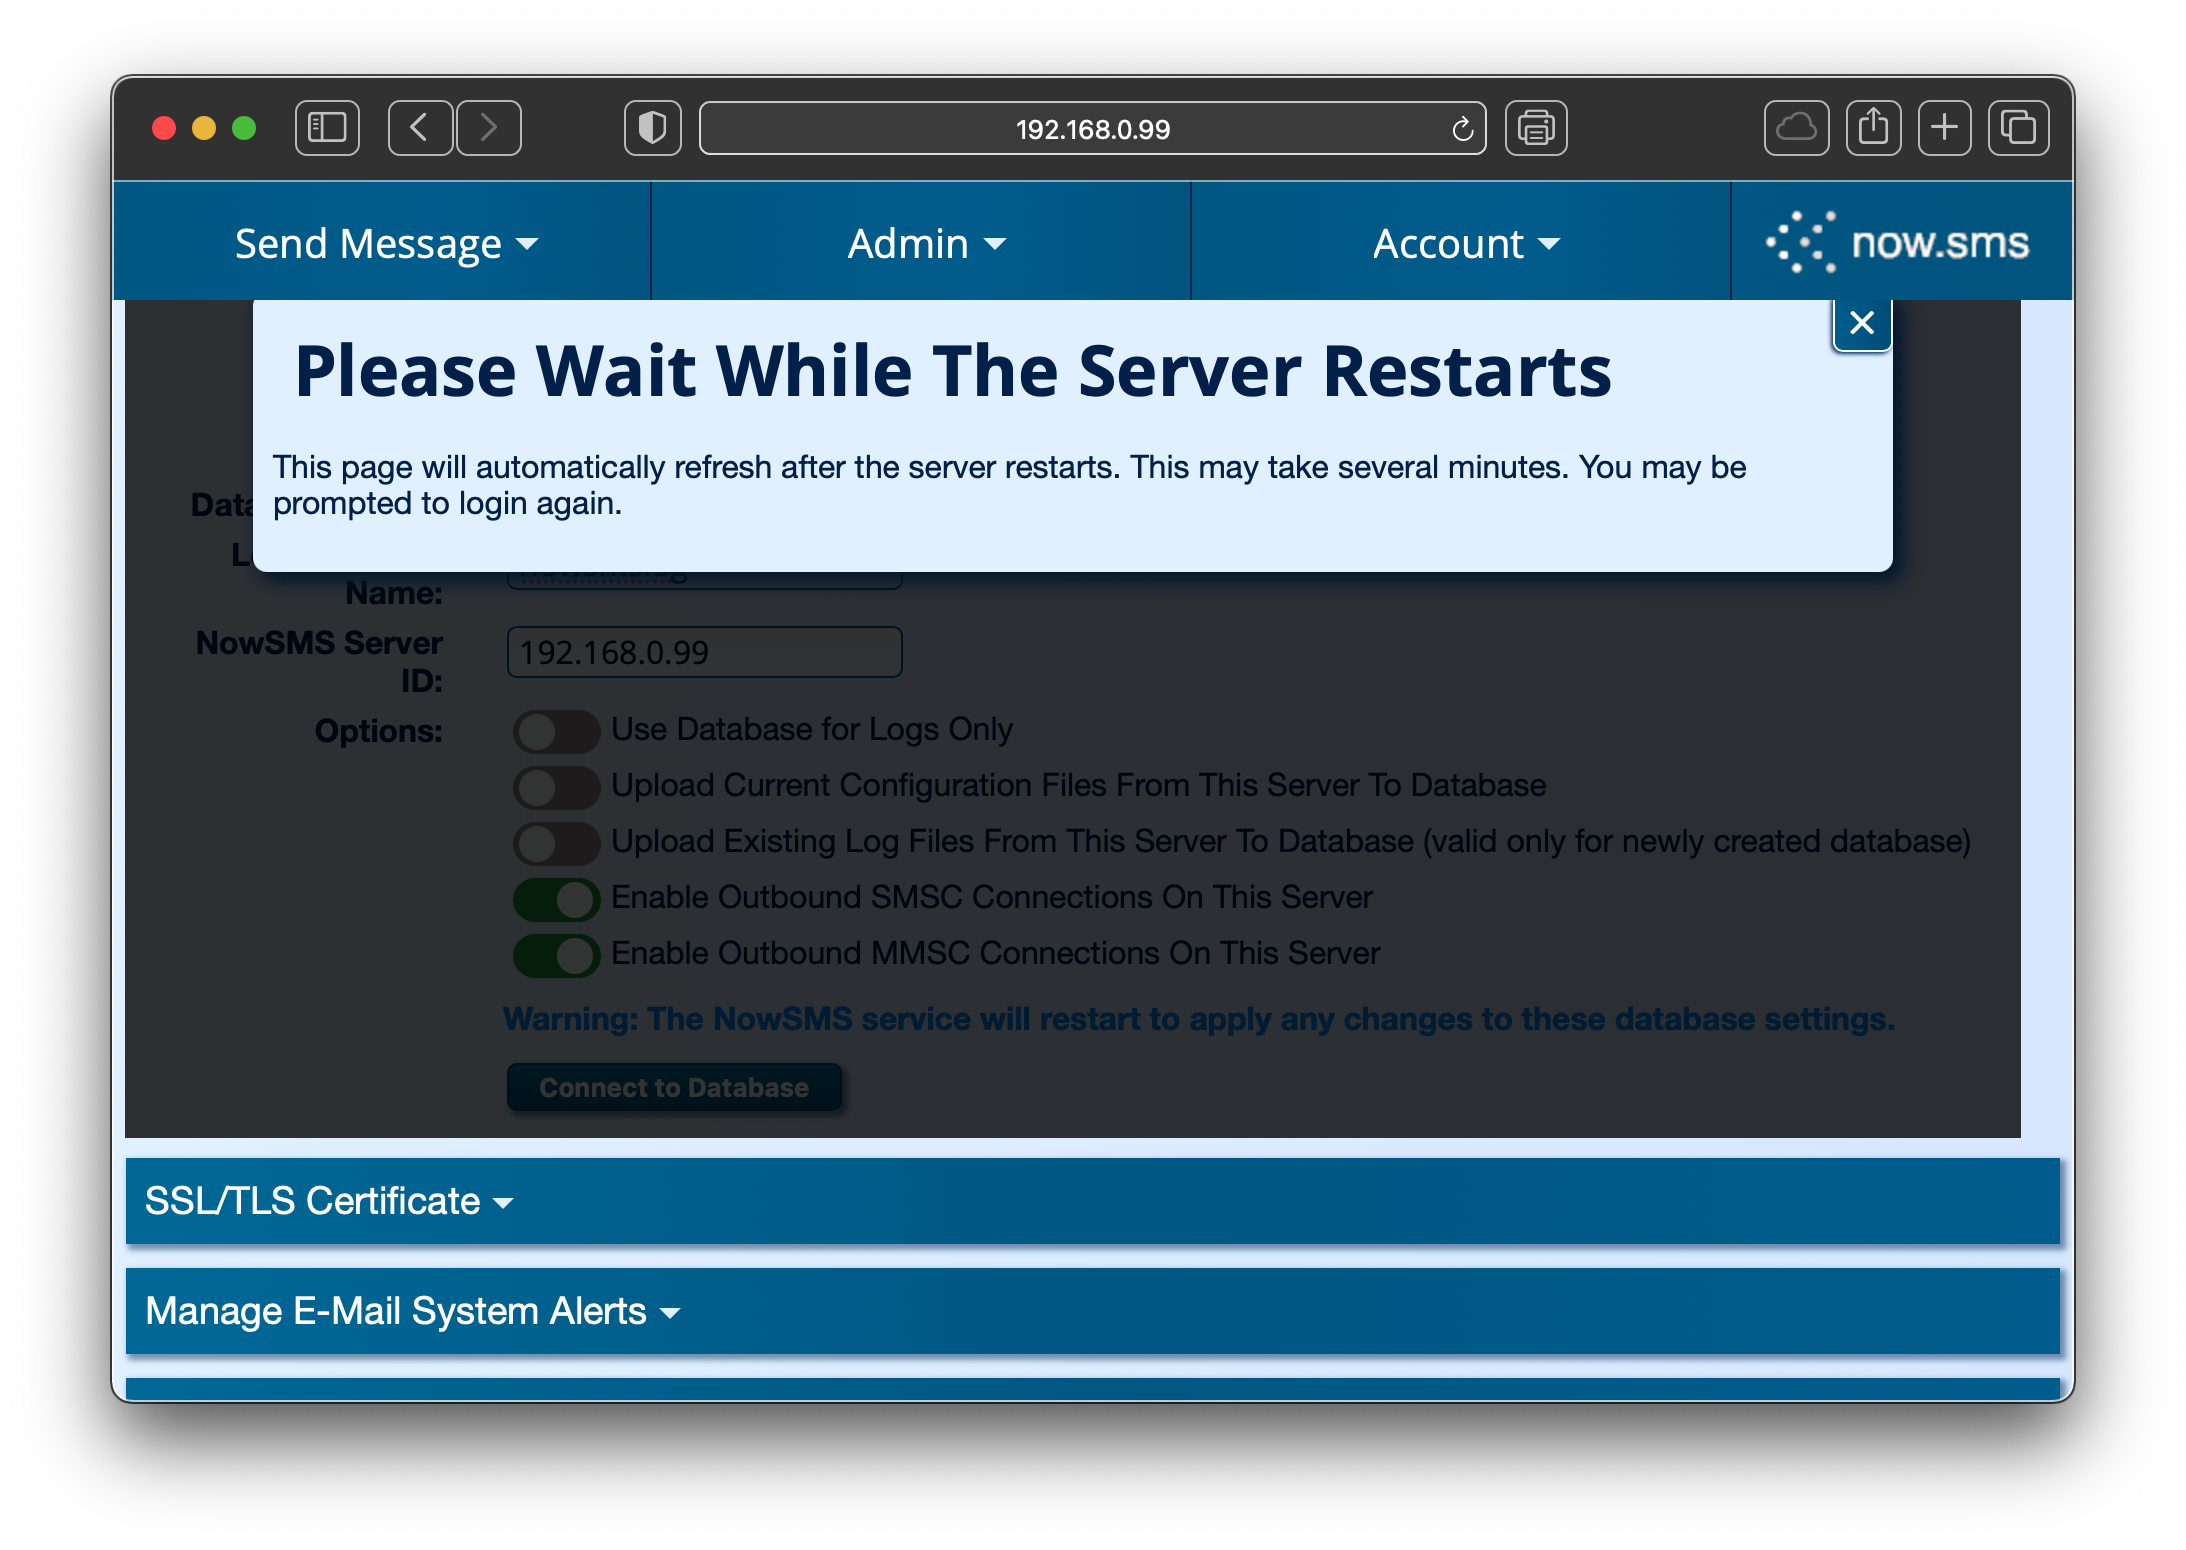
Press the “Connect to Database” button to login to the database server.
The MMSC will need to restart, and it will be necessary to login again.
Step 8: When the MMSC delivers an MMS message to a subscriber, it sends 2 binary SMS messages to the recipient. This is known as the MMS notification. An SMPP SMSC connection should be configured for the MMSC to use.
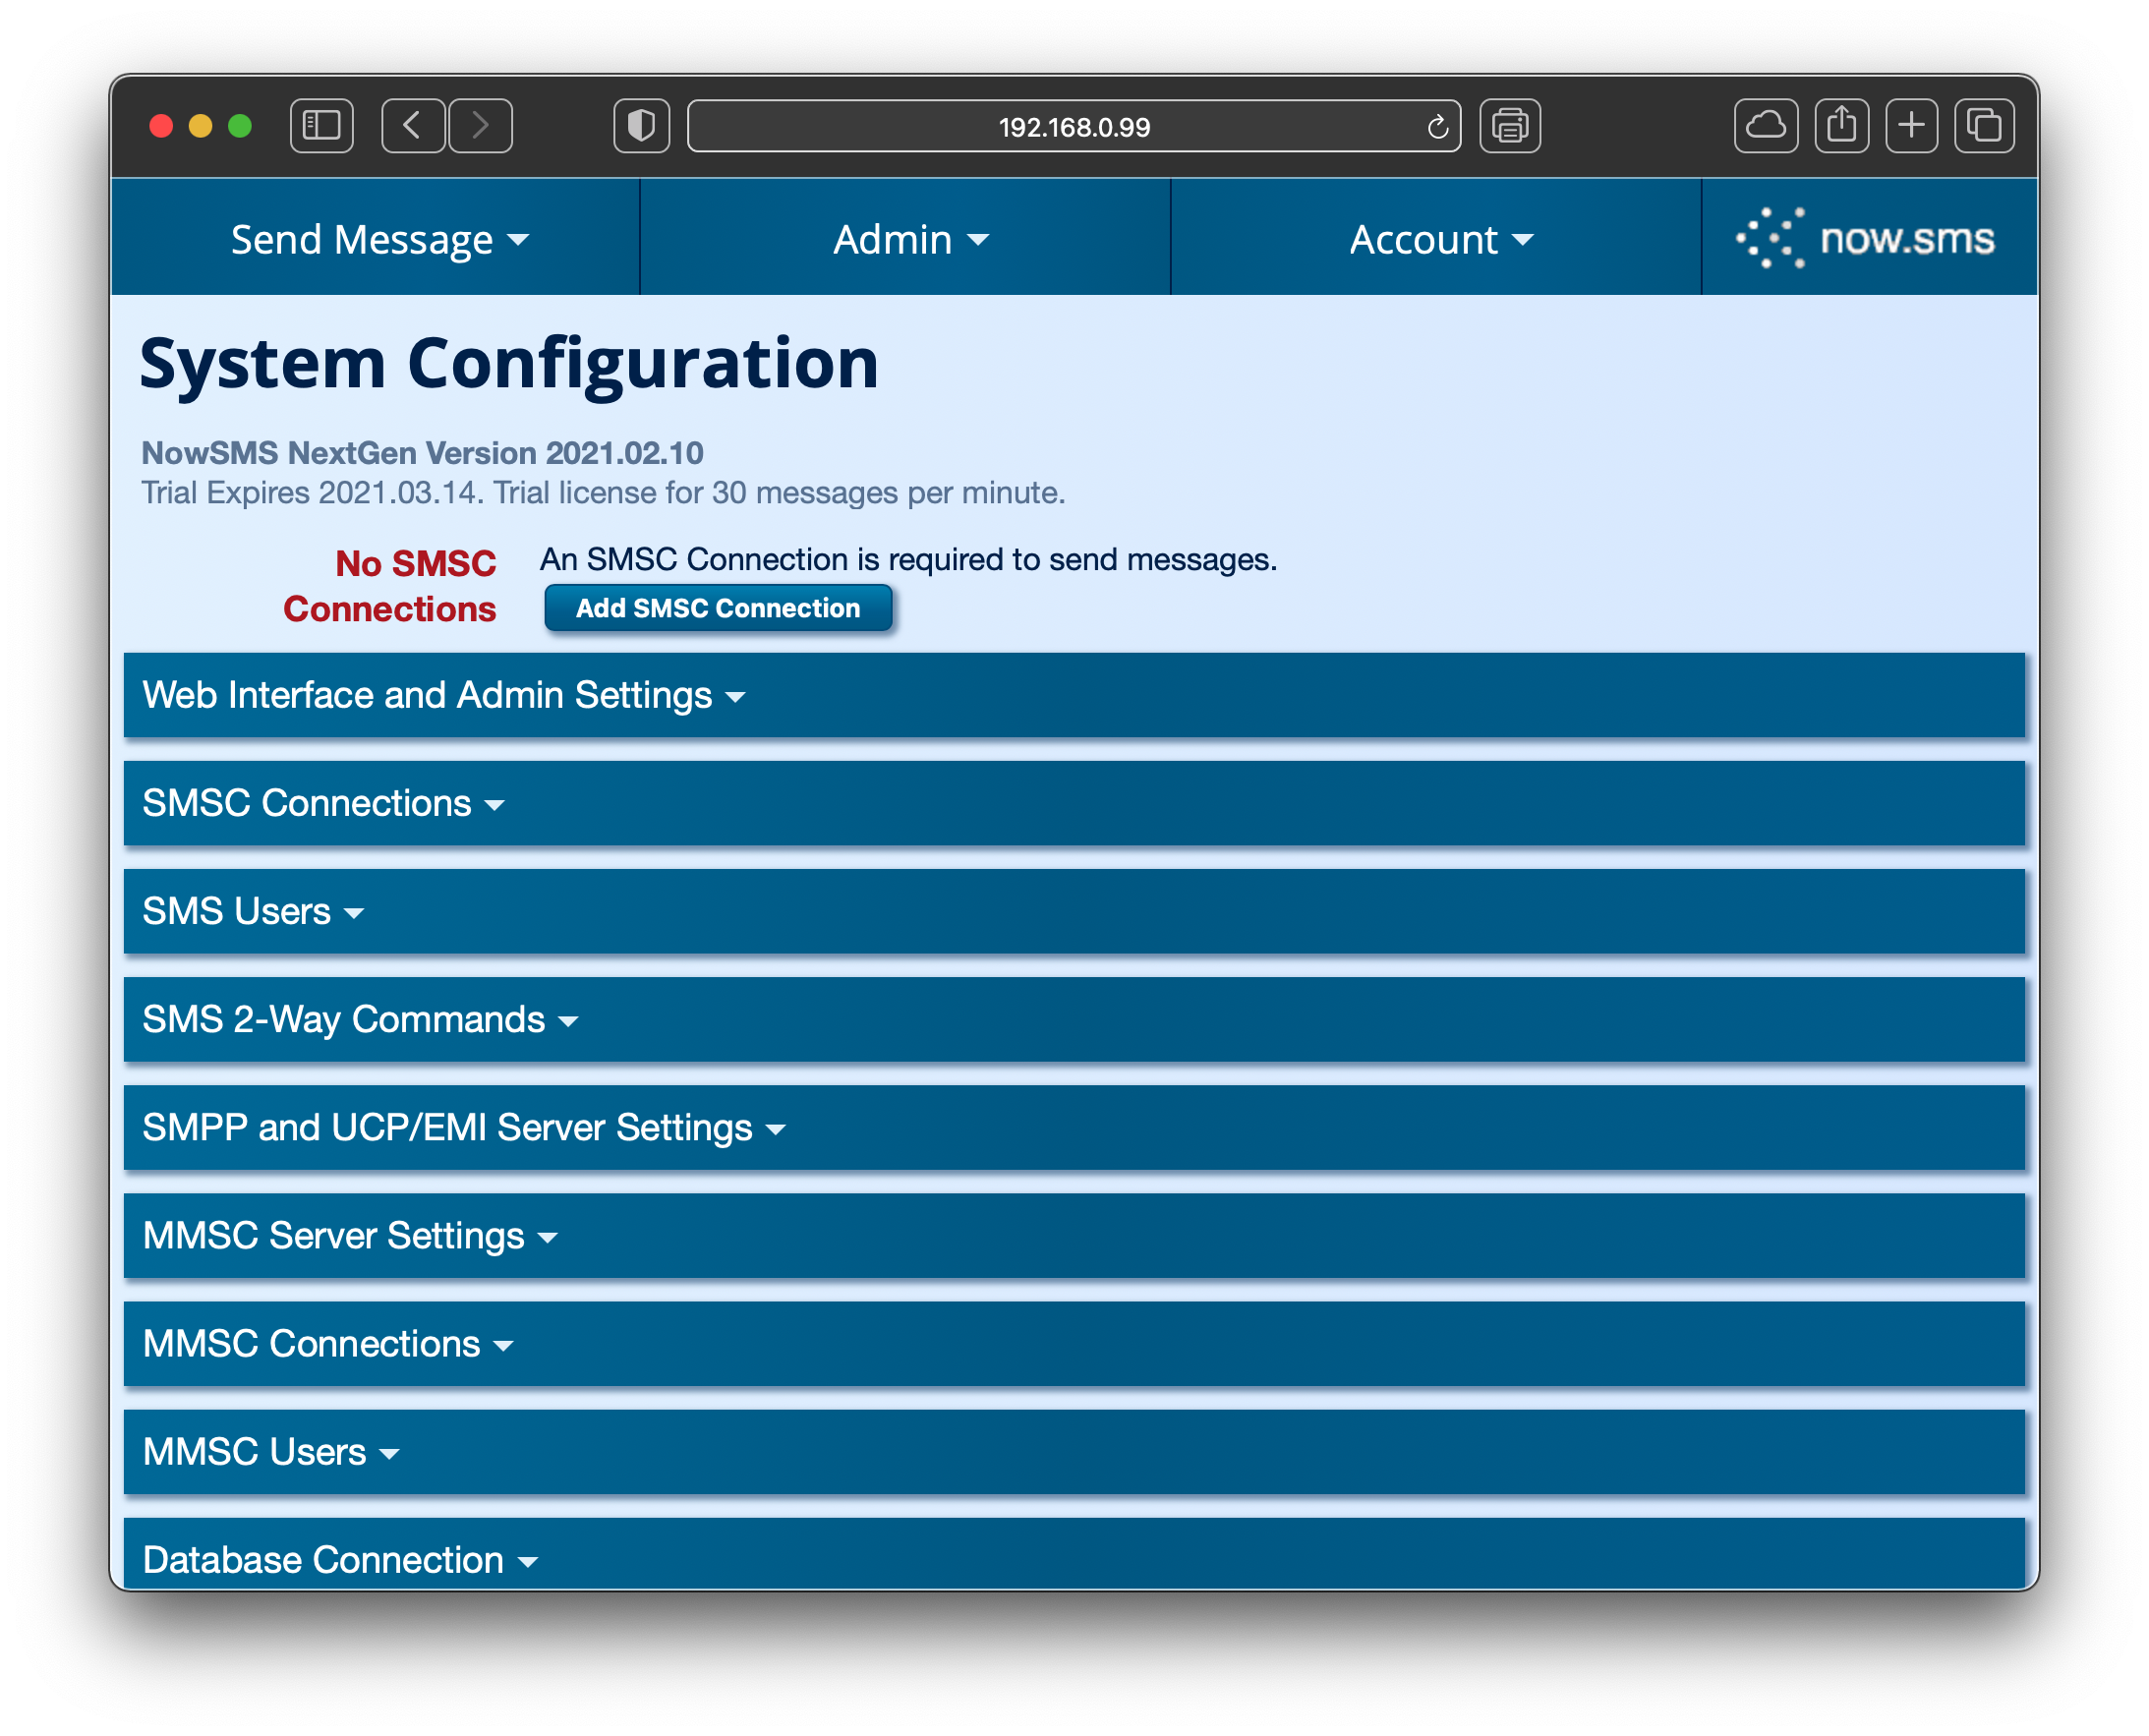
Use the “Add SMSC Connection” to define a new SMPP SMSC connection (or expand the “SMSC Connections” section of the configuration by clicking on the section header).
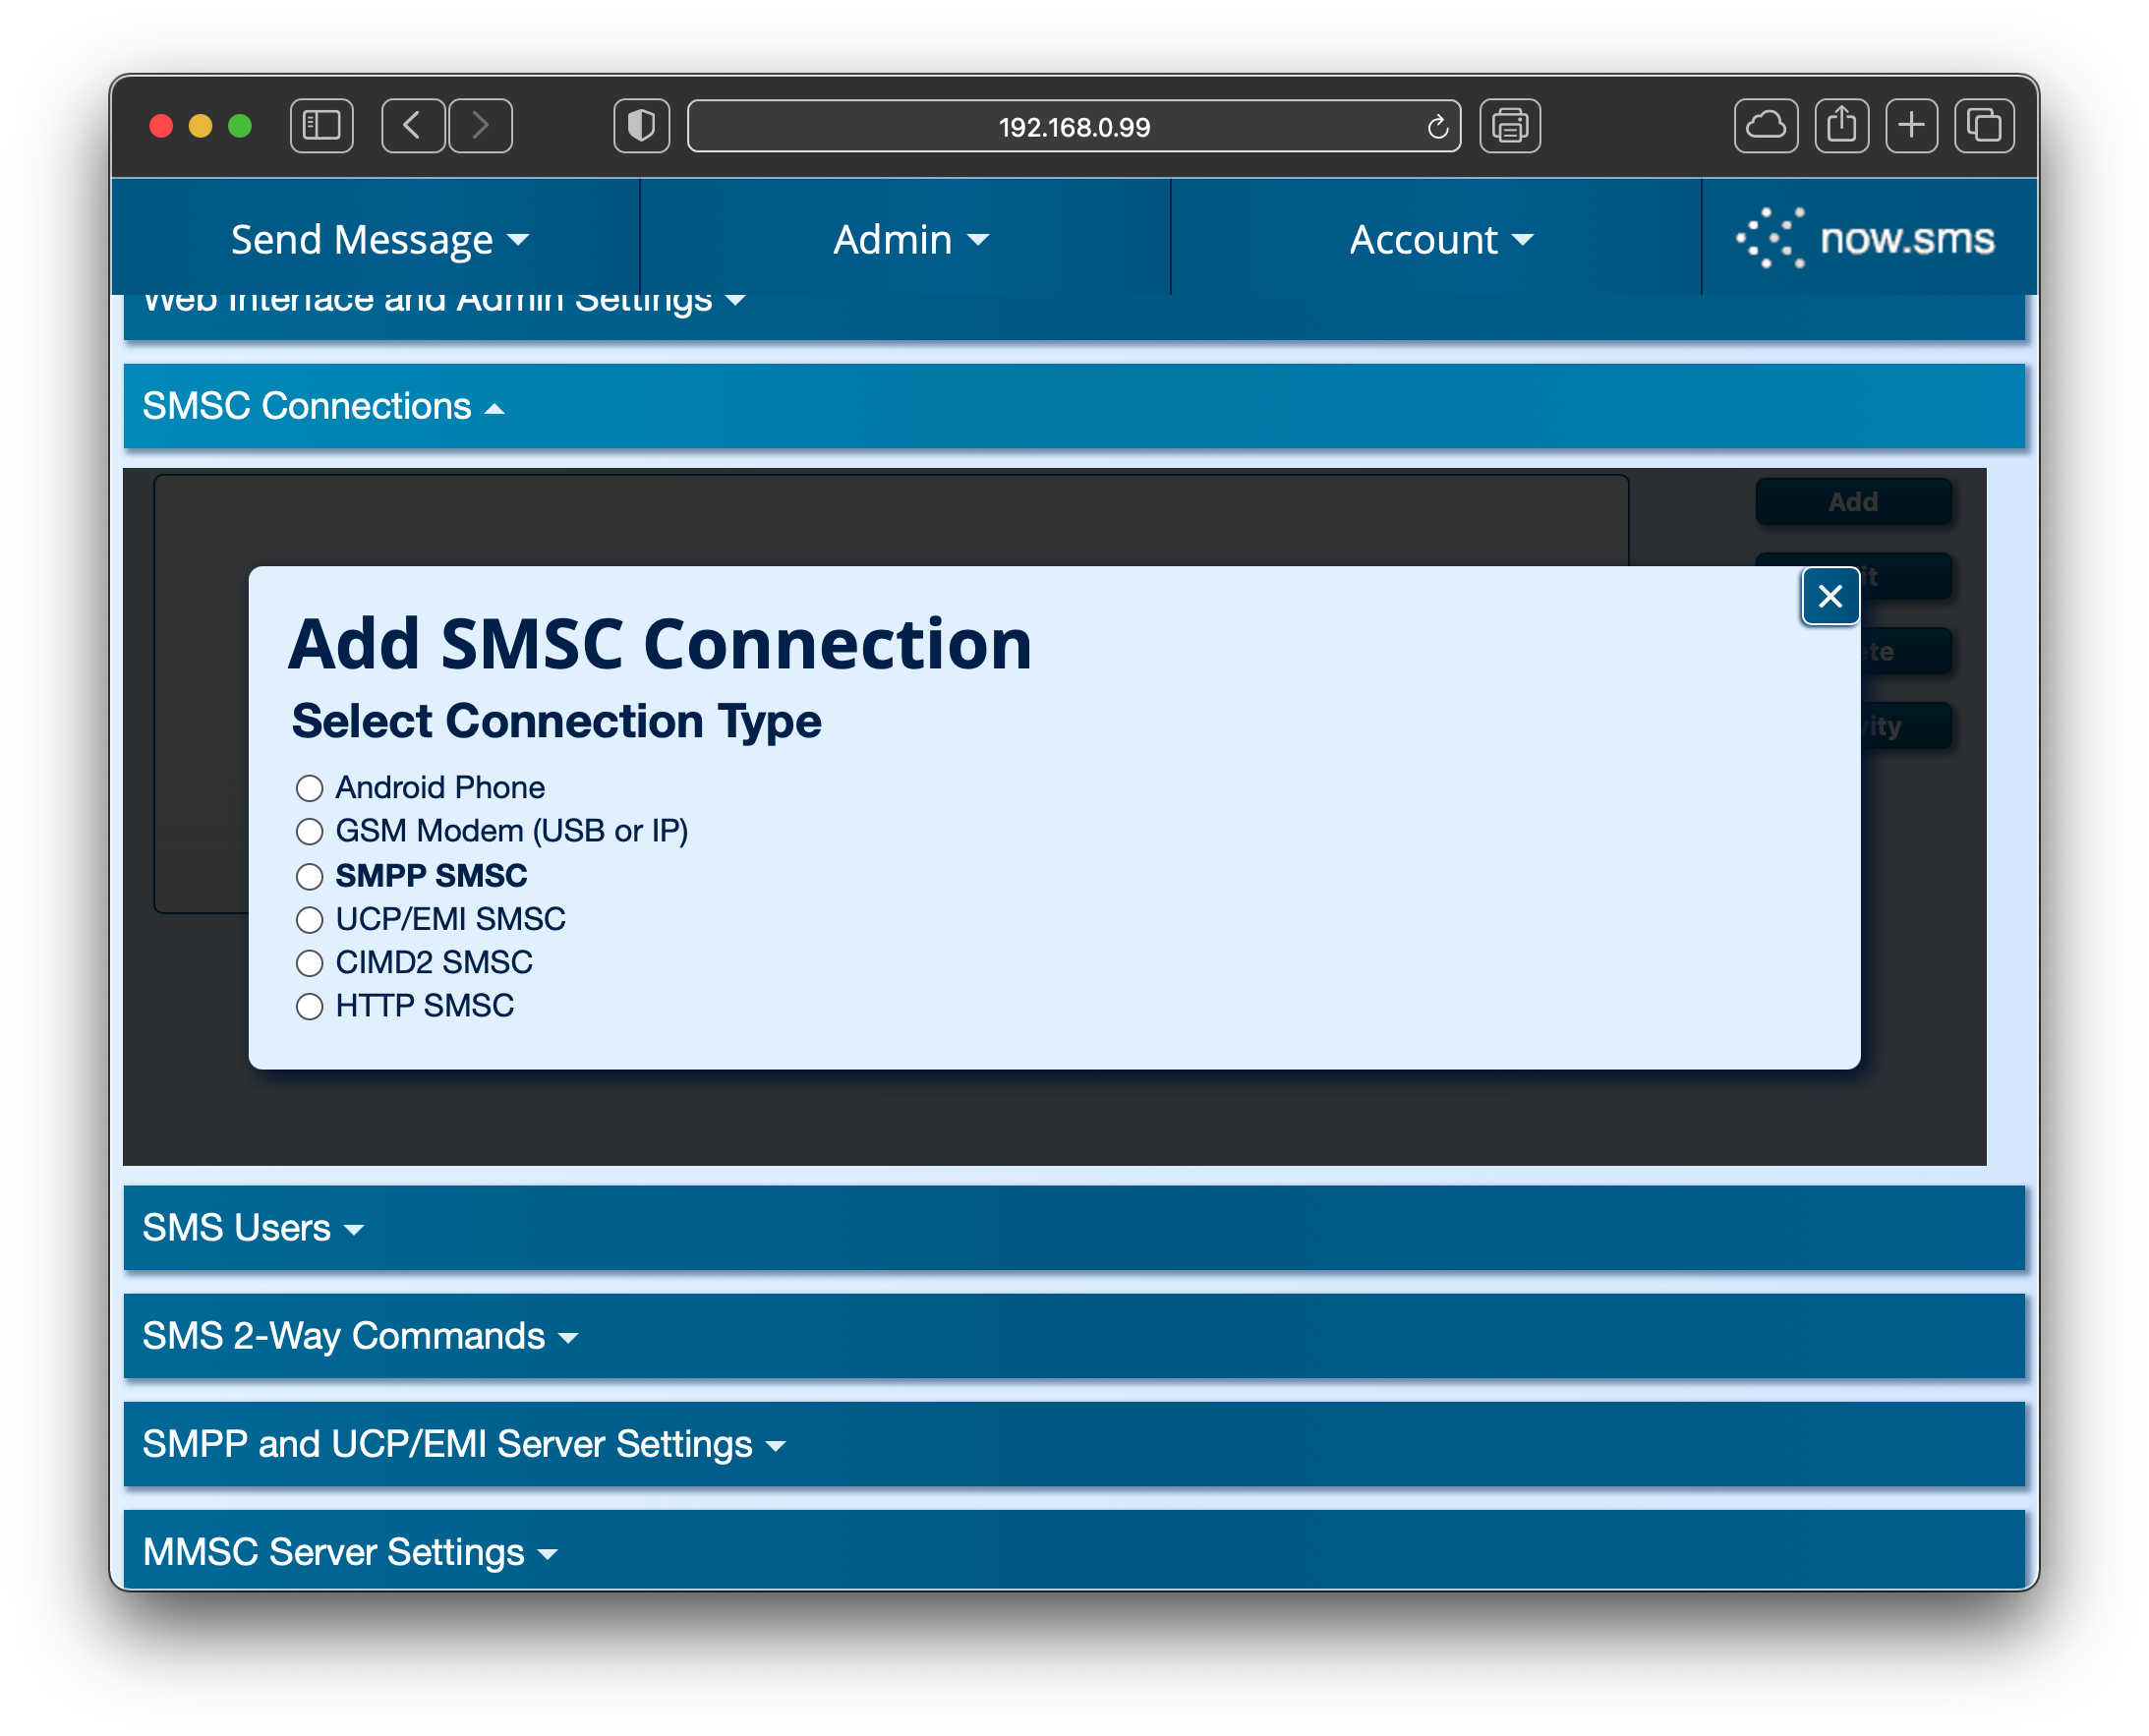
When the “Add SMSC Connection” window opens, click on “SMPP SMSC”.
There are many configuration settings for SMPP connections, but most settings can be left at their default values.
“Server Host Name” must define the IP address or DNS host name of the SMPP server and “Server Port” must define the port number. If the connection uses SSL/TLS, enable that setting. “User Name” (sometimes known as “System ID”) and “Password” refer to the credentials to be sent in the SMPP bind.
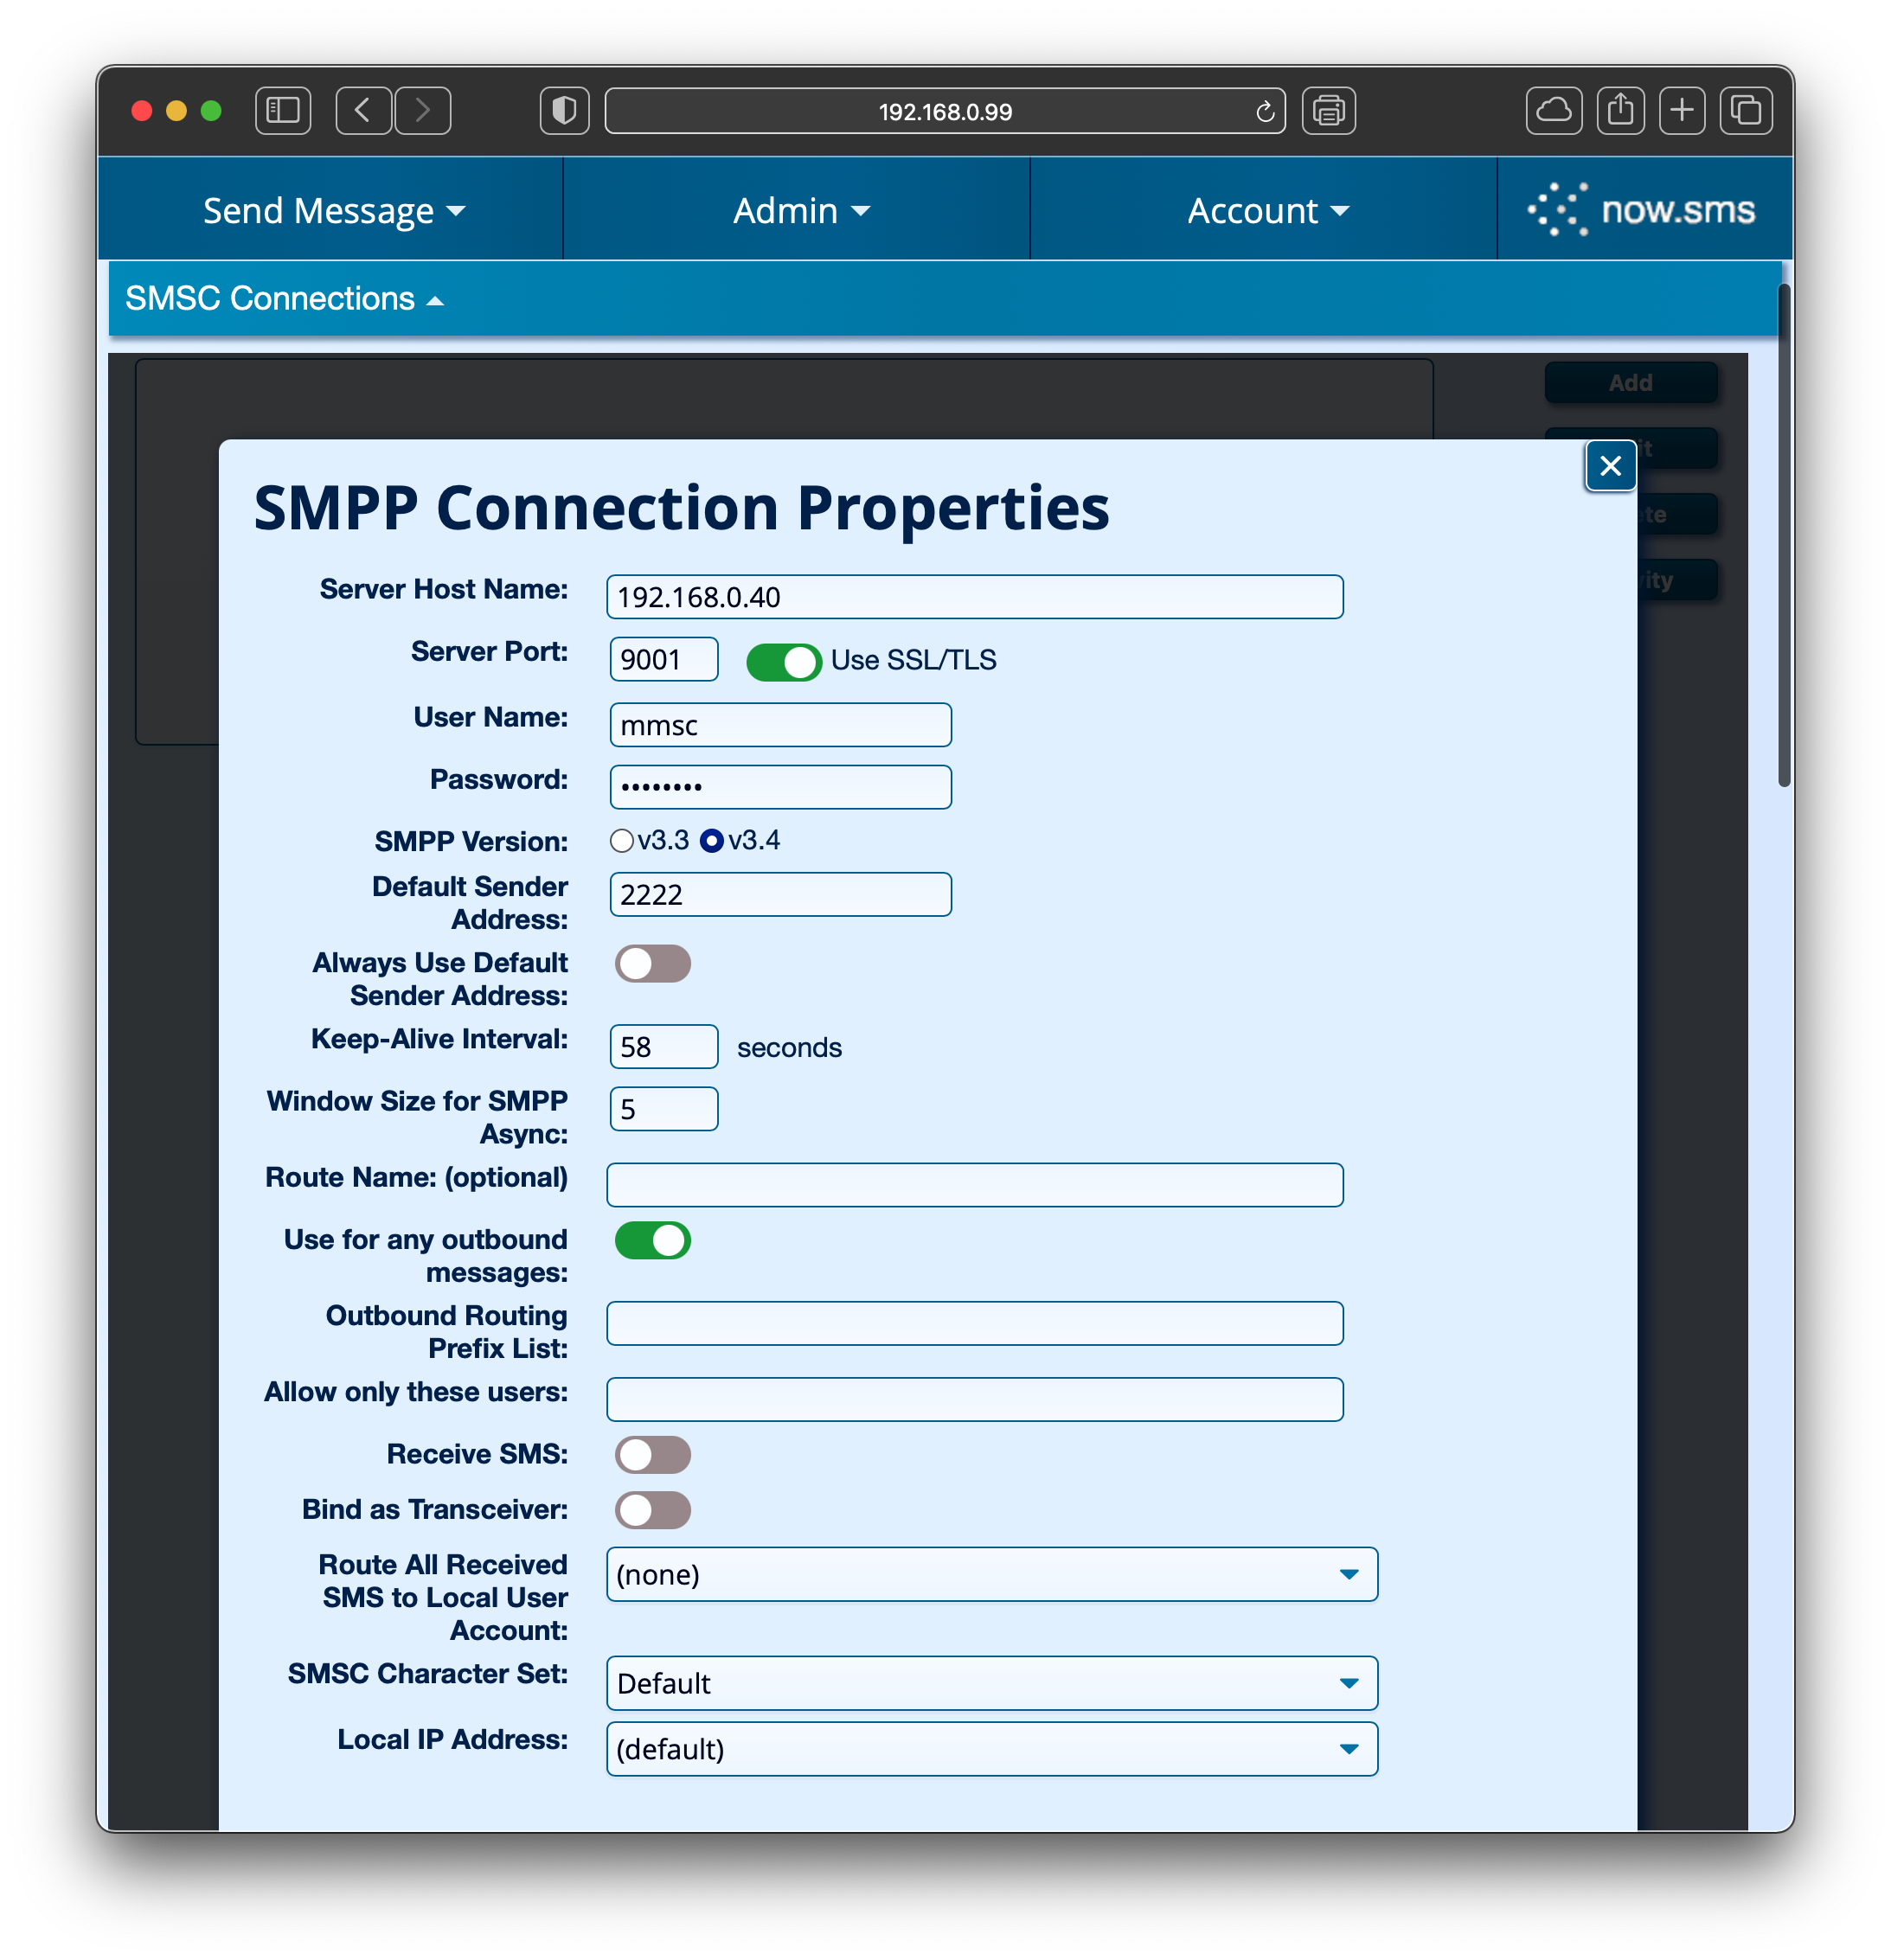
“Default Sender Address” specifies a source (sender) address for the SMS messages. The end user will not see this address, but most SMSC will not deliver a message that does not include a source address.
The “Keep-Alive Interval” specifies how often NowSMS will send an “enquire link” packet to the server, in order to keep the connection active. Most SMPP servers will timeout idle connections, but for performance reasons, it is desirable to keep the connection active. The default value is just under one minute, which is below the threshold for most servers, without generating excessive network requests.
The “Window Size for SMPP Async” is a performance related setting. The default value is good for most installations, however if you experience a problem with SMSC timeout errors, replace the value with a blank value to disable SMPP async mode for maximum compatibility.
“Use for any outbound messages” must be enabled to establish this connection as a default route for SMS messages.
Disable the “Receive SMS” and “Bind as Transceiver” settings, as this will be a send-only (transmitter) connection.
Scroll down and press the “Save” button to save the settings.

Test the SMSC connection by sending a simple test message. From the top menu, select “Send Message” / “Text”
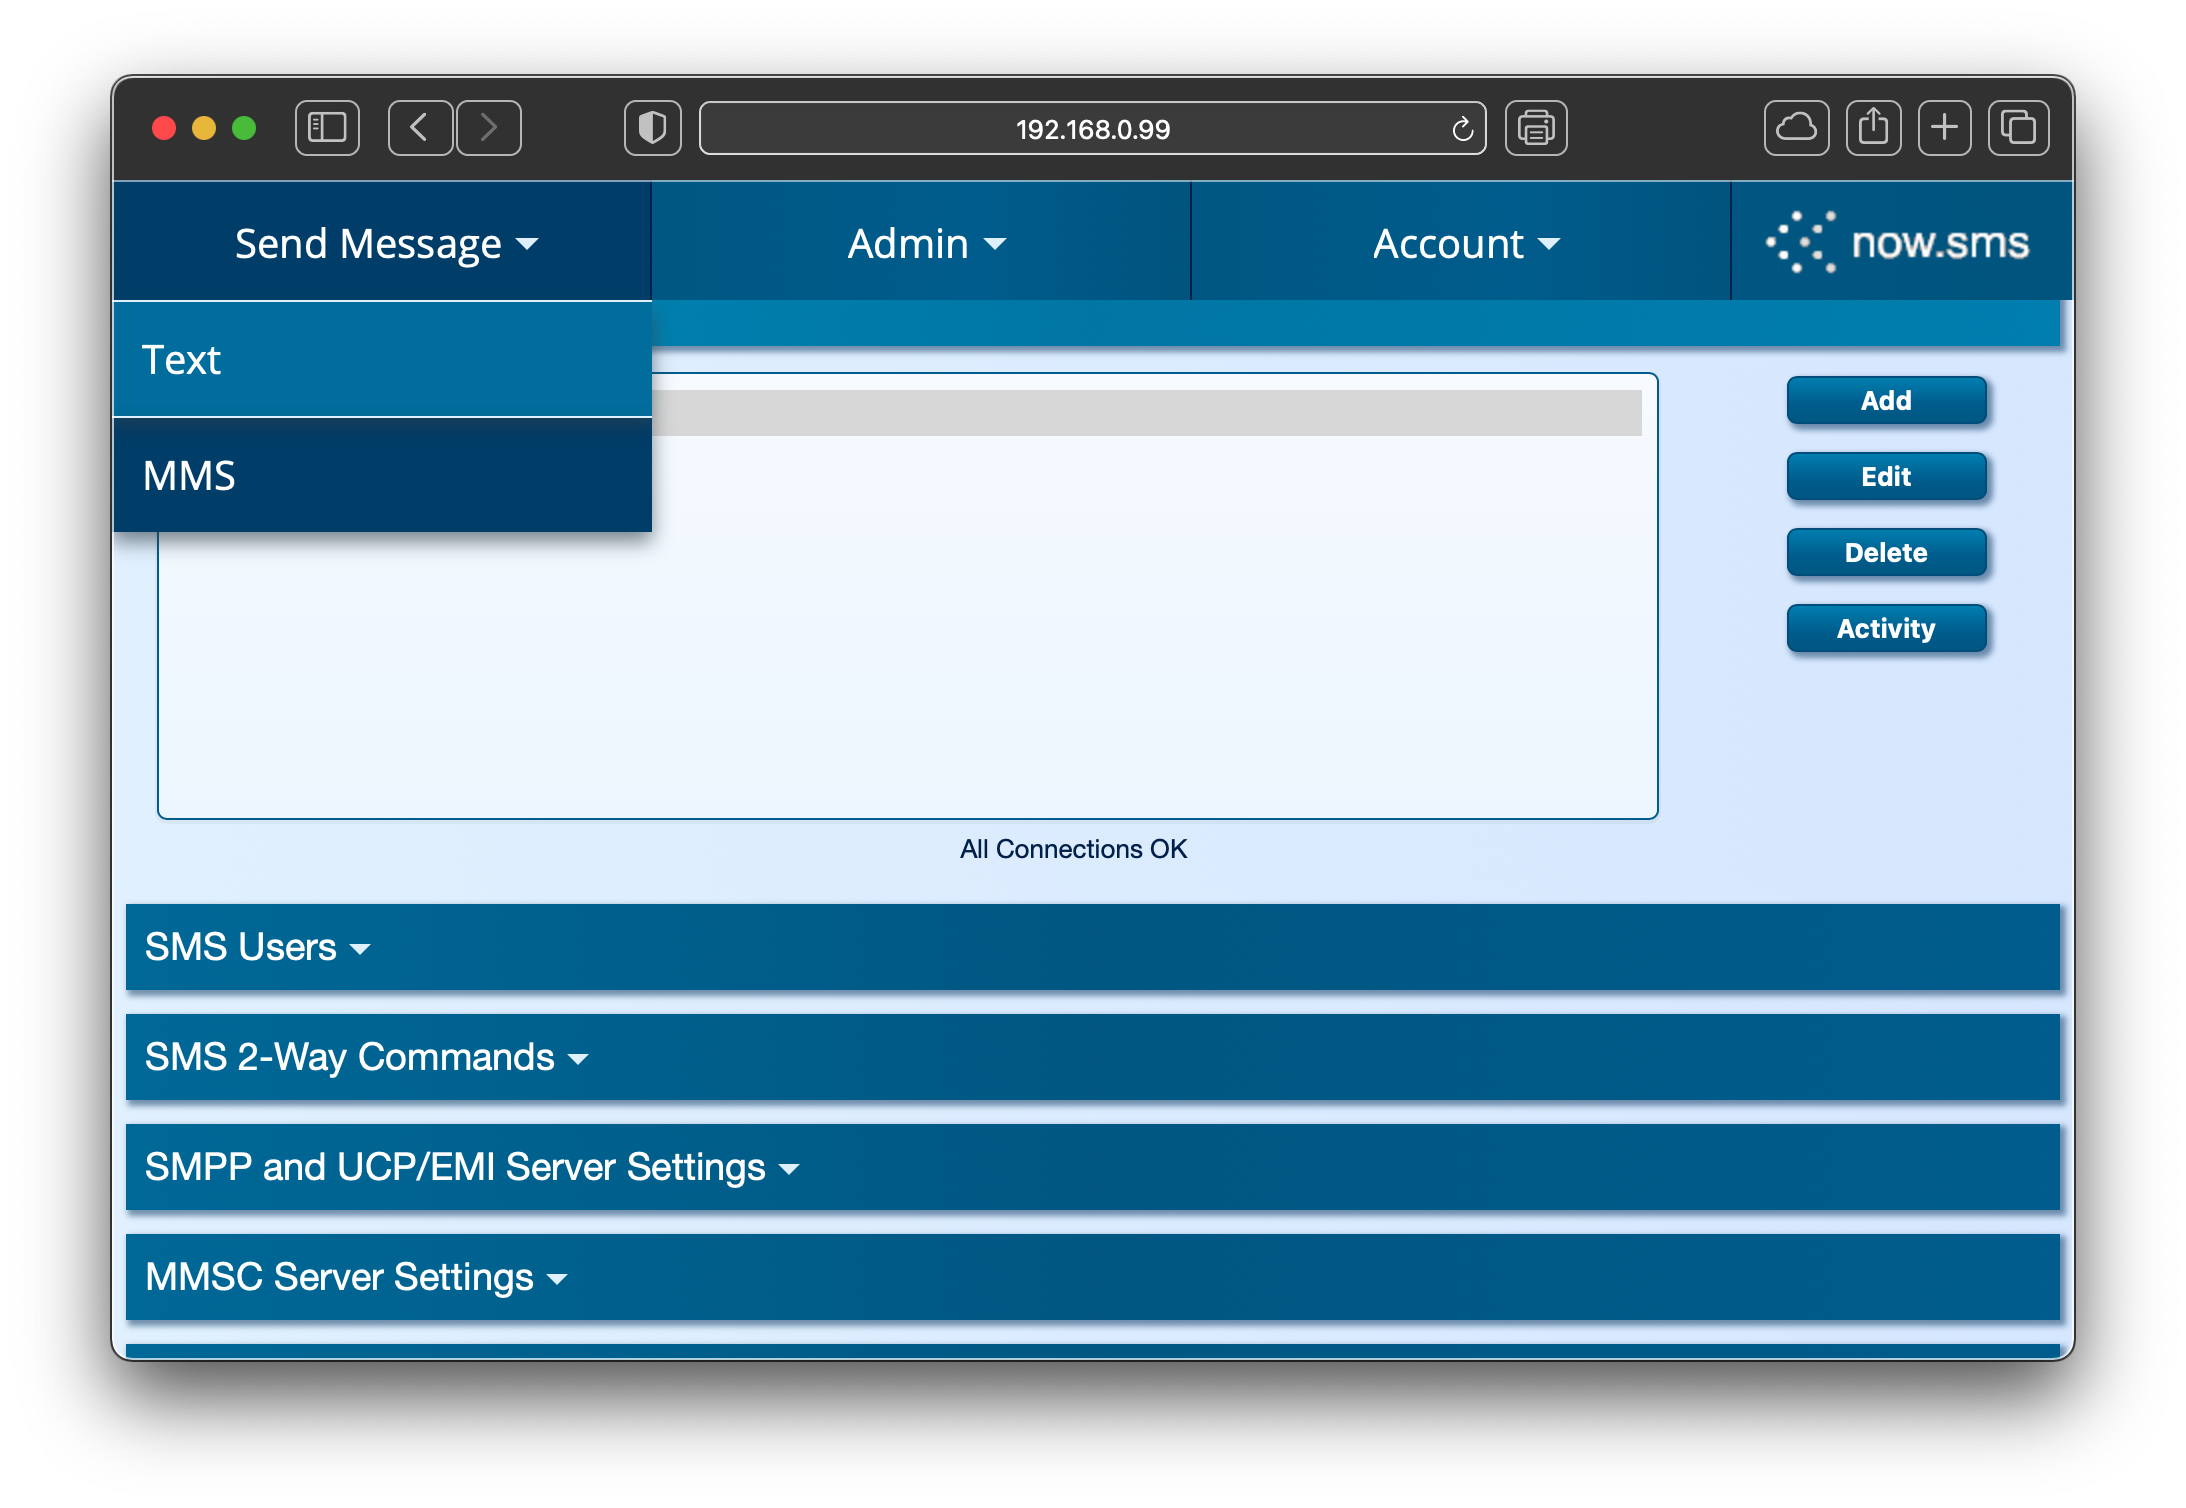
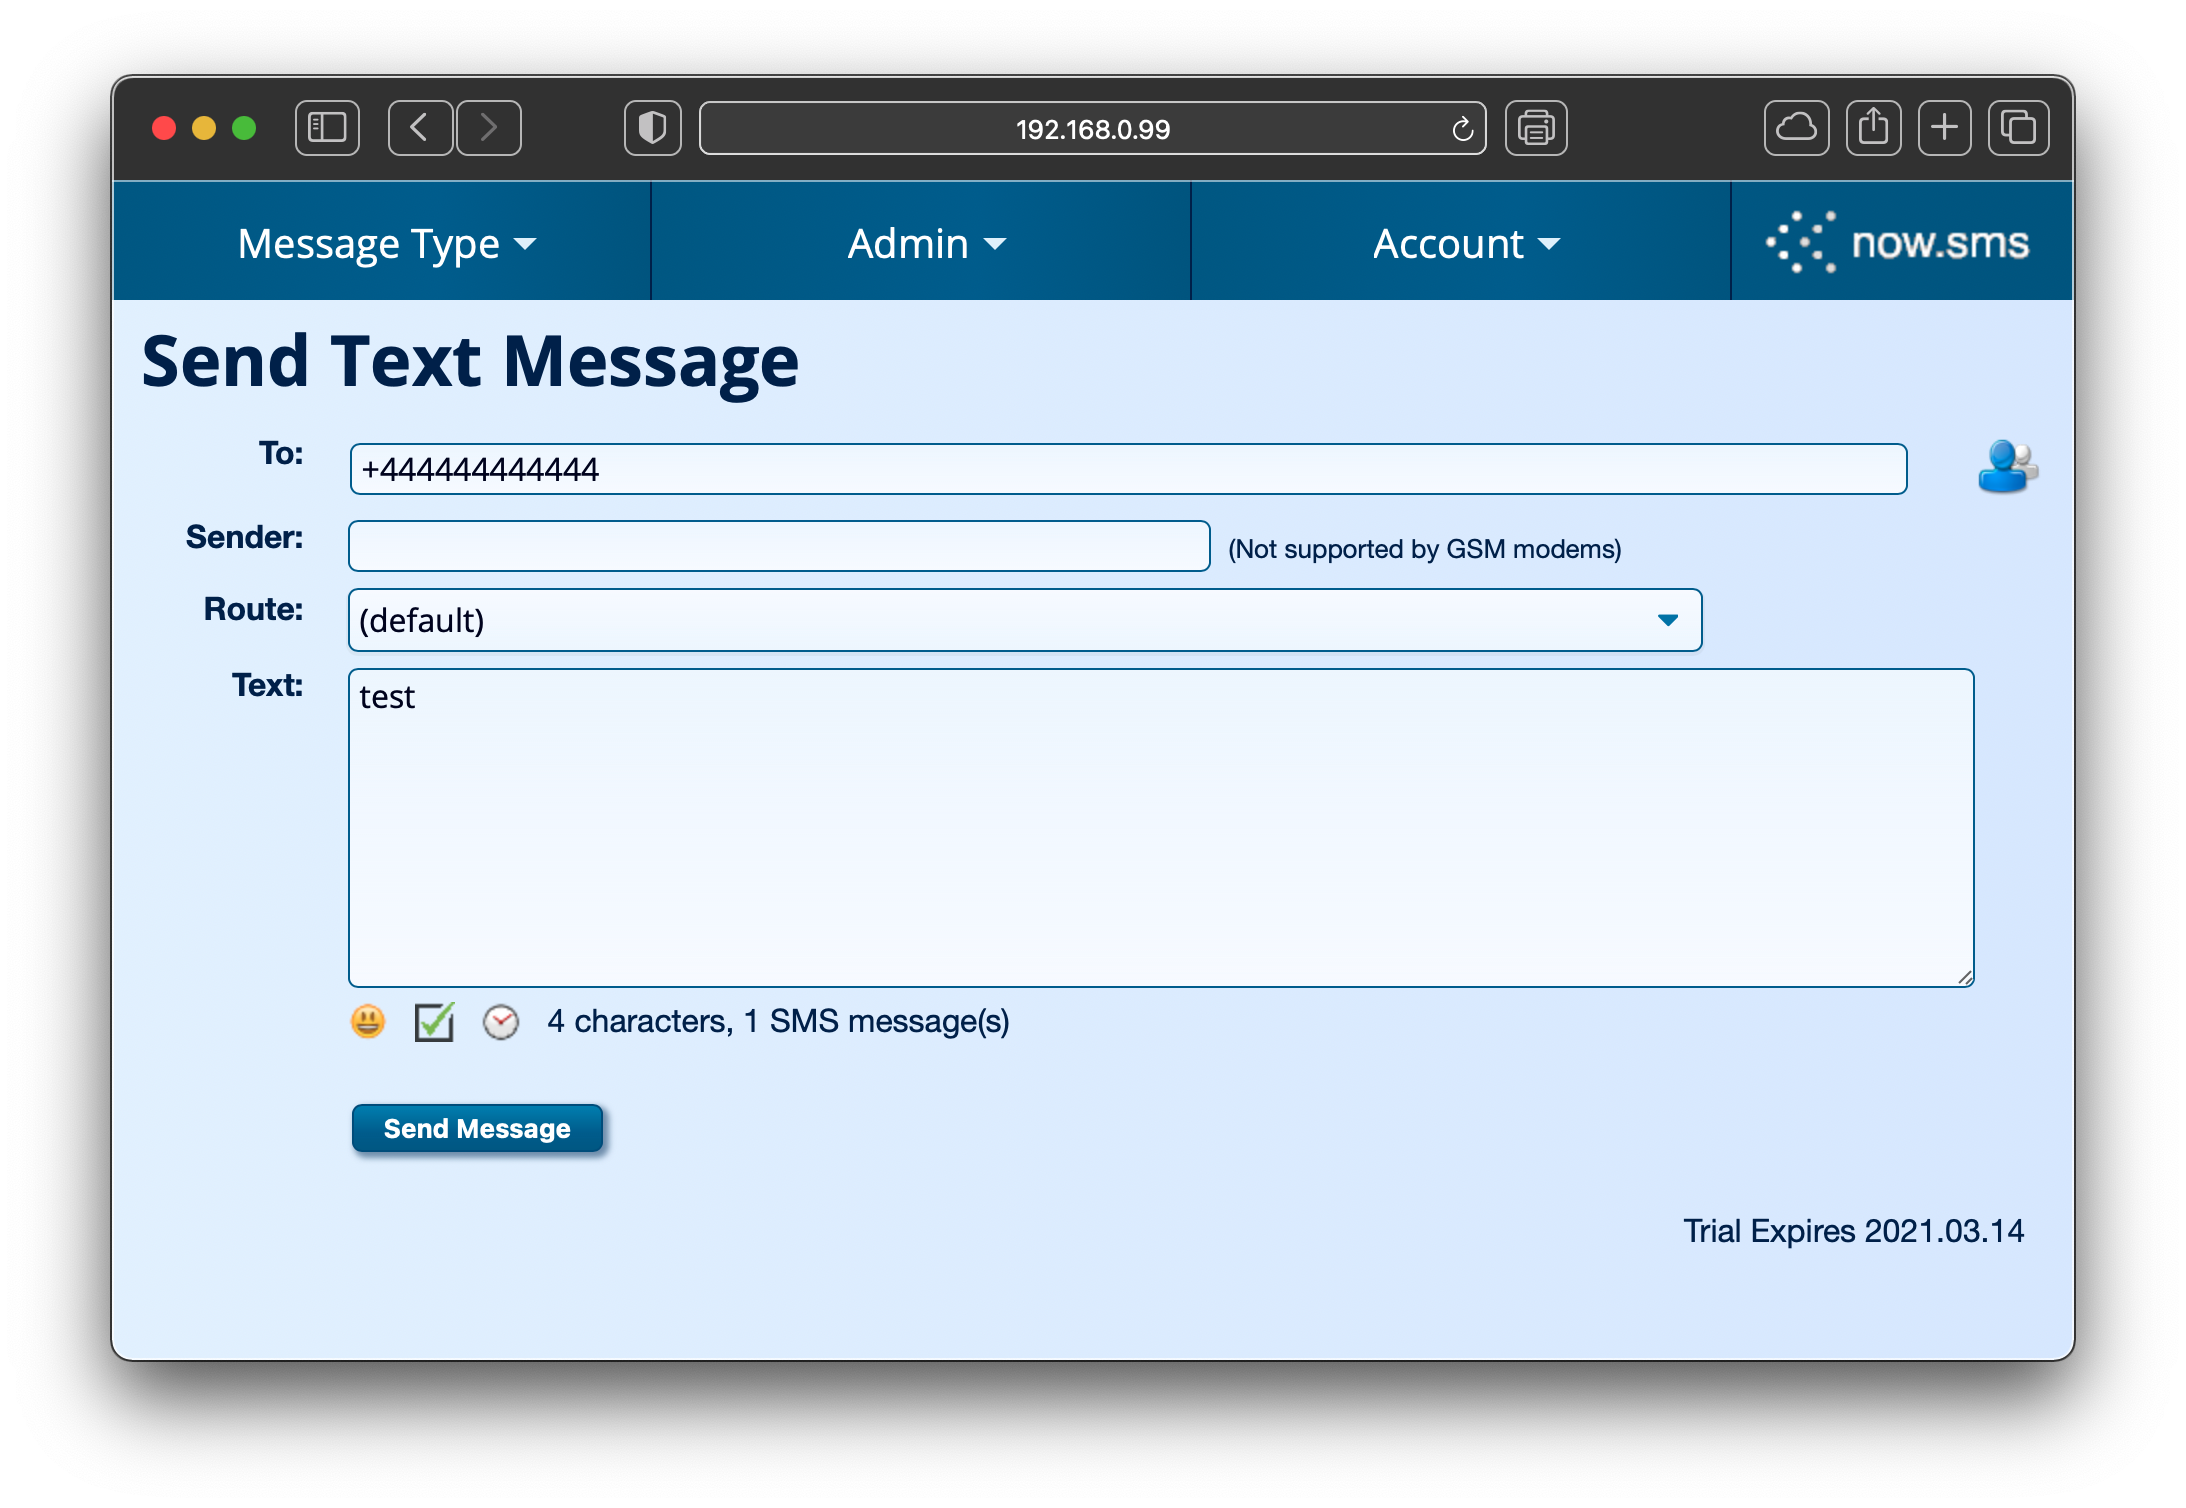
Consult “Admin” / “System Log” to review activity if the message is not received.
Step 9: Initial configuration of the MMSC.
The “MMSC Server Settings” is used to configure the basic settings of the MMSC. The image below shows the parameters that need to be configured for most installations.
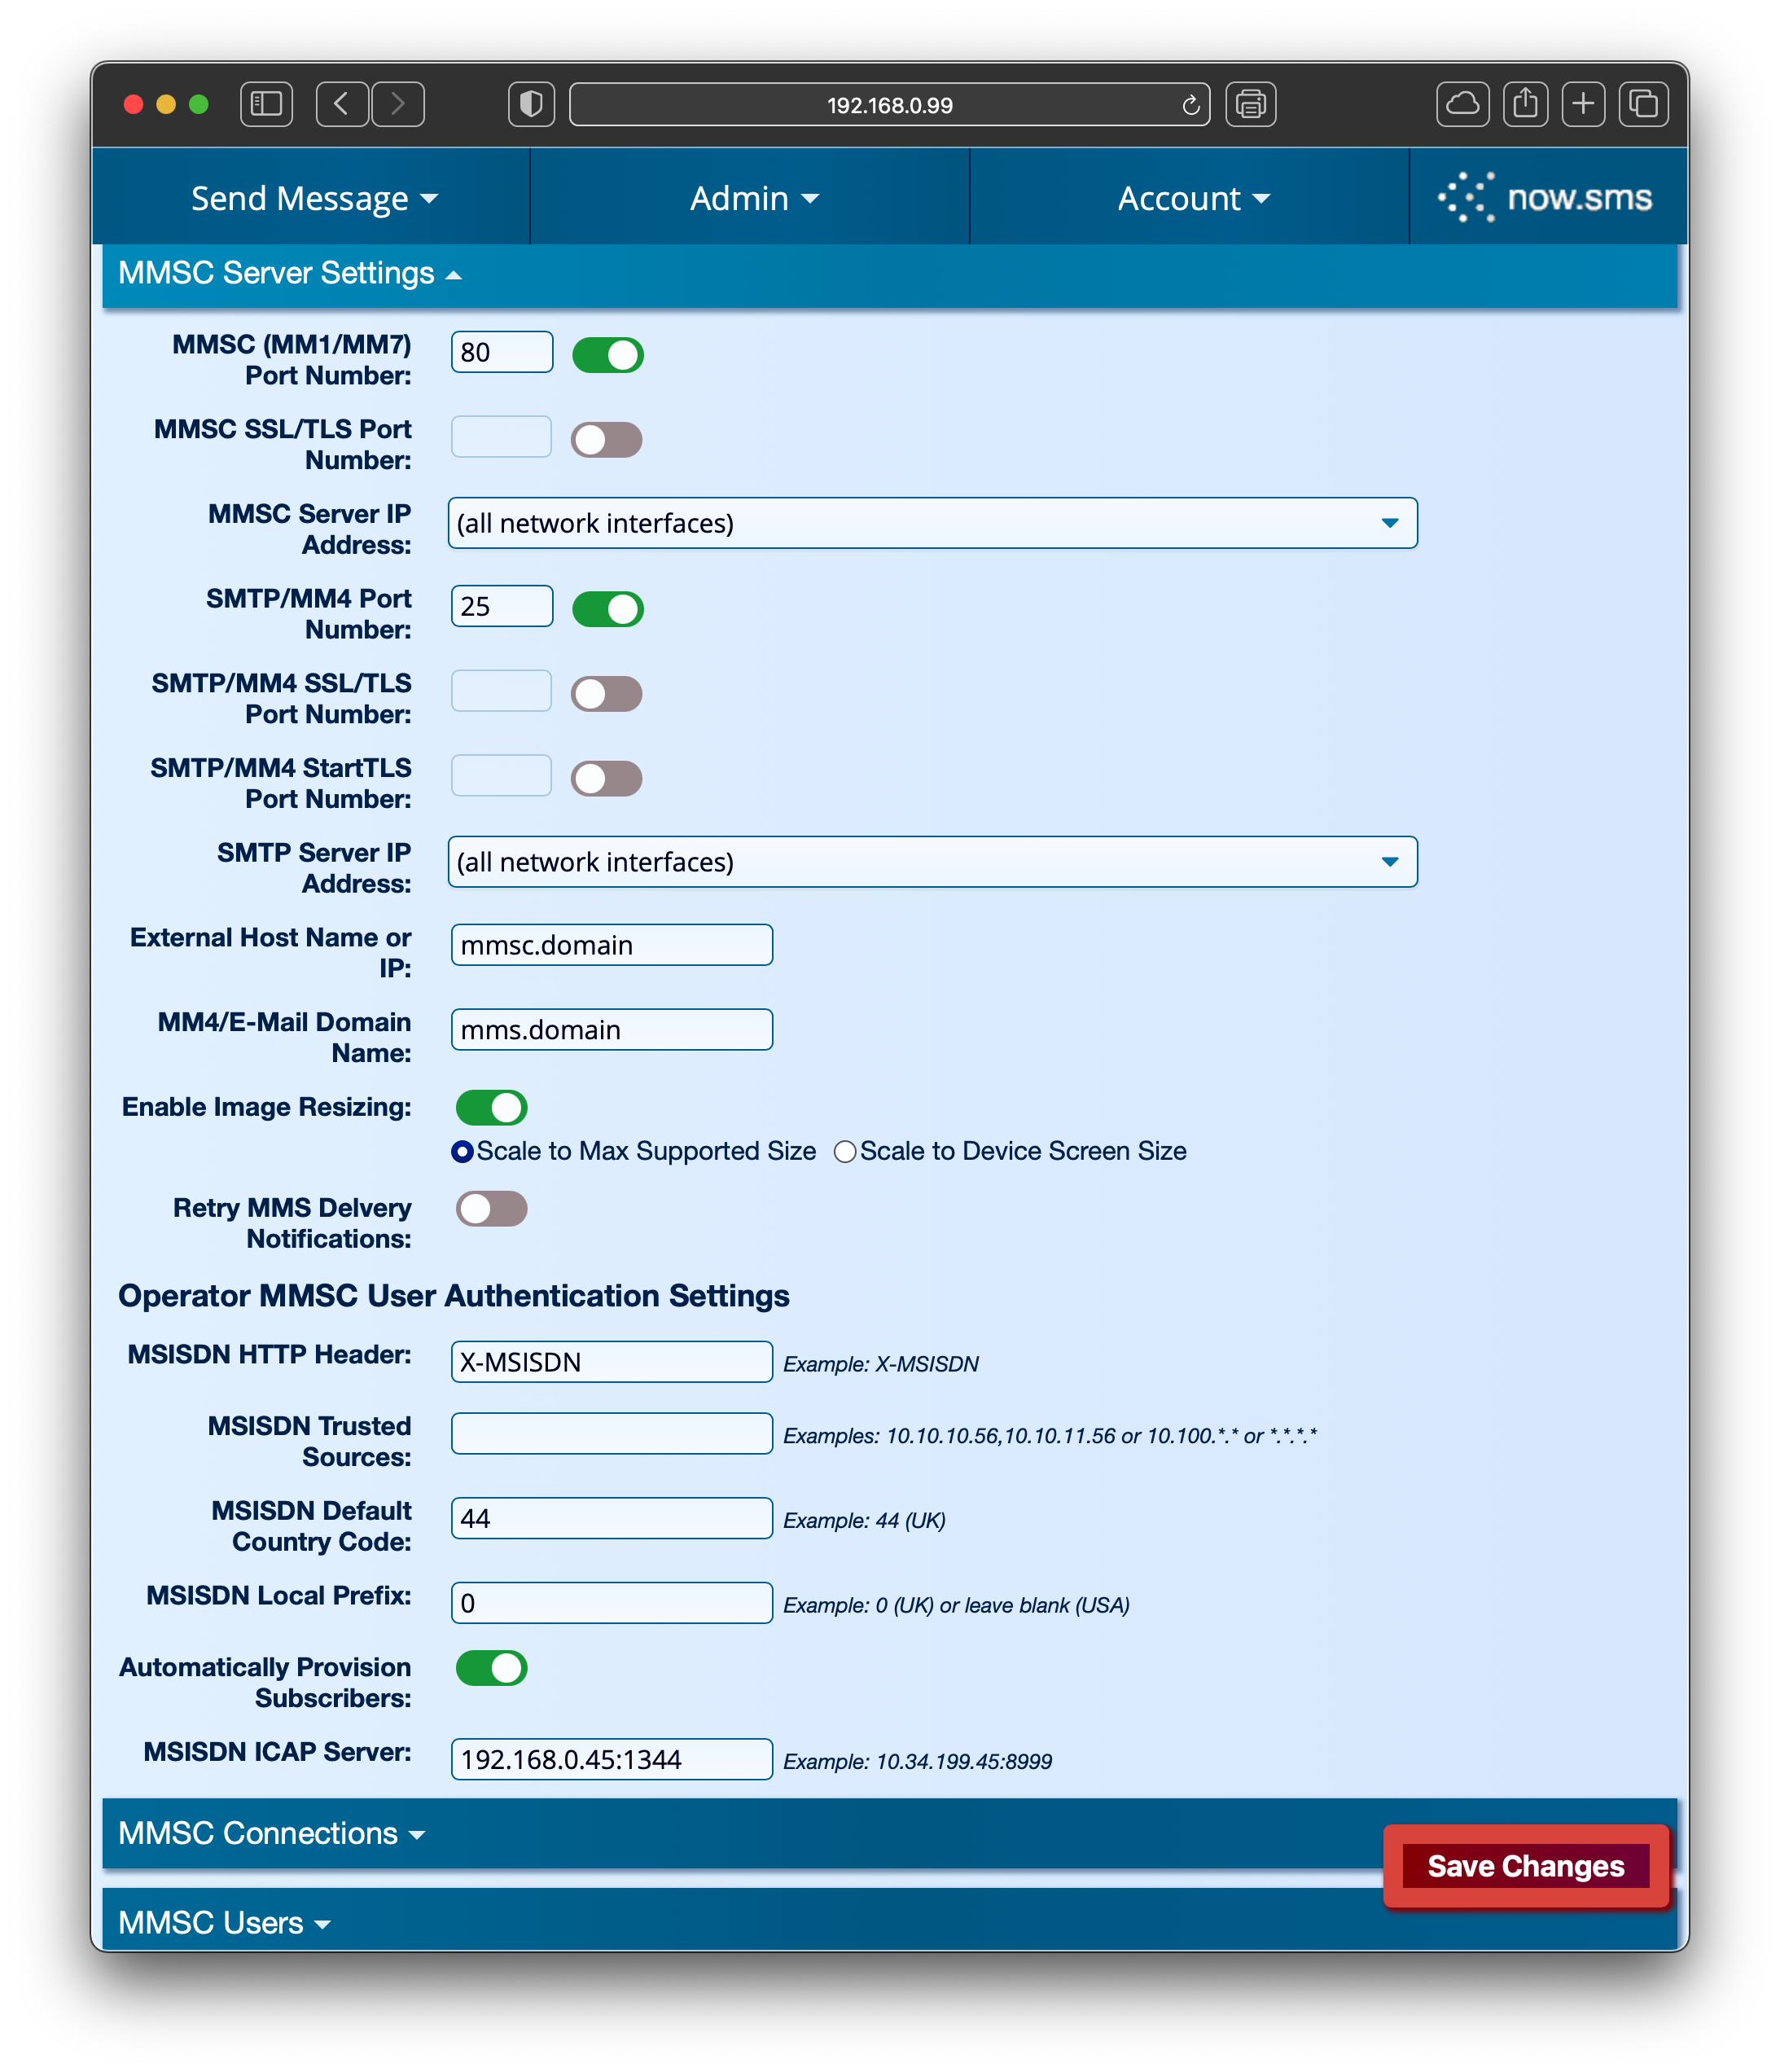
Mobile phones use the HTTP protocol to interface with the MMSC, issuing HTTP POST requests to send messages and HTTP GET to retrieve messages. Phones will need to be configured with a server address which is a combination of the settings “External Host Name or IP” and “MMSC Port Number”. (The MMSC also sends this host name and port in MMS notifications to tell the receiving device how to receive content.
SMTP/MM4 is used to interconnect with other networks, and typically uses port 25.
The “MM4/E-Mail Domain Name” is the domain name applied to your subscribers when a message is routed out via MM4.
“MSISDN HTTP Header” – The MMS protocol does not define user authentication/identification. The MMSC receives all requests via TCP/IP. There are different ways that the MMSC can authenticate users but all of these techniques involve other network components inserting an HTTP header that contains the MSISDN. This HTTP header is usually X-MSISDN.
This header can be inserted by the SGSN, or other proxies or gateways. Or, the MMSC can use the ICAP protocol to query a network component for the MSISDN.
“Automatically Provision Subscribers” means that the MMSC will automatically provision a subscriber when the subscriber first sends an MMS. By default, the MMSC will only directly deliver MMS messages to provisioned subscribers.
For initial testing purposes, it may be useful to change the default routing to be “Direct Delivery (internal MMSC)”. This setting is configured in “MMSC Connections”:

Note that when an MM4 connection is defined for external routing, that MM4 connection will be configured as the “Default Route” for MMS.
To circumvent the requirement that subscribers must be provisioned, an HTTP-based callback must be created that allows the MMSC to query whether the recipient of a message is local, should be routed to an external route via MM4, or blocked/rejected. The following link describes this interface: https://www.nowsms.com/doc/mmsc-messaging-server/operator-mmsc-considerations/mobile-number-portability-mnp-considerations
Special testing note: If you are experiencing delays implementing the “MSISDN HTTP Header”, there are ways to test the MMSC with real live devices, circumventing the header requirement:
a.) Many modern devices include the sender MSISDN when submitting an MMS message. However, this is not a trustworthy means of identification. To enable this setting for testing purposes, add MSISDNHeaderTrustClient=Yes under the [MMSC] section of MMSC.INI.
b.) If a password is included when manually provisioning an account under “MMSC Users”, the mobile phone can be configured with an account specific URL using the format http://server:port/username=password
Step 10: MM4 Connectivity
Please refer to our training document: NowSMS MMSC Training: MMSC Interconnection Protocol (MM4), which is available at: https://www.nowsms.com/techsupport/training/mmsc-interconnection-protocol-mm4
The configuration settings described in that document include references to the Windows version of NowSMS. Similar settings can be found in the “MMSC Connections” section of the NextGen “System Configuration” interface.
For comments and further discussion, please click here to visit the NowSMS Technical Forums (Discussion Board)...
NowSMS NextGen for Linux

Purchase NowSMS
![]()